I remember sitting at my studio bench three years ago, staring at a beautiful, leather-hard vase that I had completely ruined with a single, shaky slip stroke. I thought sgraffito ceramic etching was all about having the steadiest hands in the world or owning a thousand-dollar set of precision tools, but I was dead wrong. The truth is, most beginners fail not because they lack talent, but because they treat the clay like a delicate piece of glass instead of a living, breathing medium. Once I stopped overthinking the “perfect” line and started working with the moisture levels of my slip, everything finally clicked.
In this guide, I’m stripping away the fluff and the intimidating studio jargon to show you how it’s actually done. We’re going to dive into the grit of choosing the right tools, mastering that crucial “sweet spot” of clay dryness, and avoiding the messy mistakes that turn a masterpiece into a scrap heap. Whether you’re looking to add intricate patterns or bold, graphic textures, you’ll walk away with the practical, hands-on skills needed to make your designs truly sing. Let’s get scratching.
Table of Contents
Guide Overview
Tools & Supplies
- Sgraffito tool or needle tool for scratching designs
- Fine-tip paintbrush for applying slip
- Soft sponge for cleaning excess slip
- Bisque-fired clay piece (1 unit)
- Colored ceramic slip (1 container)
- Water bowl (1 unit)
Step-by-Step Instructions
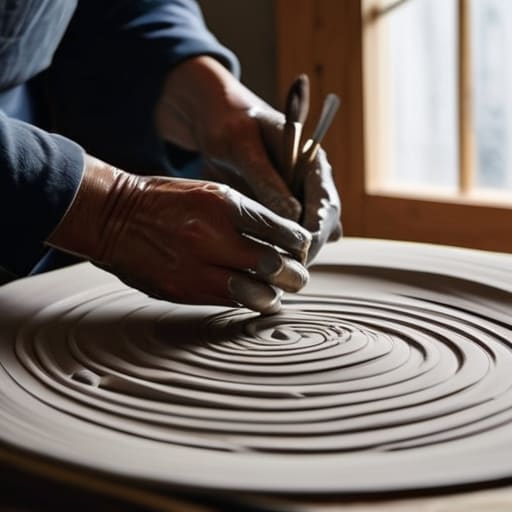
- 1. First things first, you need to get your base layer ready. Once your piece is leather-hard—meaning it’s firm but still has a little give—apply a thin, even layer of colored slip or underglaze. I usually use a soft sponge to smooth it out because you want a perfectly even canvas before you start making any permanent marks.
- 2. Let that slip dry until it reaches a “cheese-hard” stage. This is the sweet spot where the surface isn’t sticky anymore, but it hasn’t turned into a brittle, dusty mess yet. If you try to etch while it’s too wet, you’ll just end up smearing the color around instead of actually carving into it.
- 3. Now, grab your tools. You don’t need a professional kit to start; a simple needle tool, a loop tool, or even a sharpened wooden skewer will work wonders. The trick is to find a tool that feels natural in your hand, as you’ll be doing a lot of fine, controlled movements.
- 4. Start sketching out your design. If you’re feeling nervous about committing to a permanent line, use a very light pencil to ghost in your shapes first. Just remember that once you start carving, there’s no turning back, so take your time and breathe through the process.
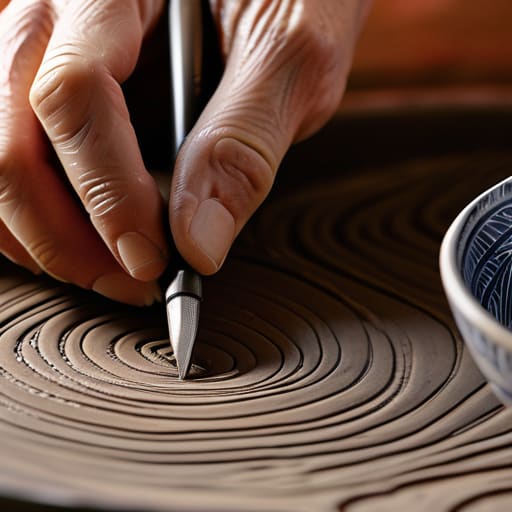
- 5. Begin the etching process by applying light, steady pressure. Don’t try to plow through the clay in one go; instead, think of it like drawing with depth. It’s much easier to go over a line twice to deepen it than it is to fix a deep gouge that you carved too aggressively.
- 6. As you work, keep a small, damp sponge or a soft brush nearby to whisk away the tiny clay shavings. If those little bits pile up in your grooves, they can dry and clog your design, making it look cluttered and messy rather than crisp and intentional.
- 7. Once you’re happy with your pattern, let the piece dry completely to bone-dry status before firing. This ensures that any tiny cracks or imperfections in your etching are baked out of the system before they hit the heat of the kiln.
Mastering Ceramic Slip Application Techniques for Depth
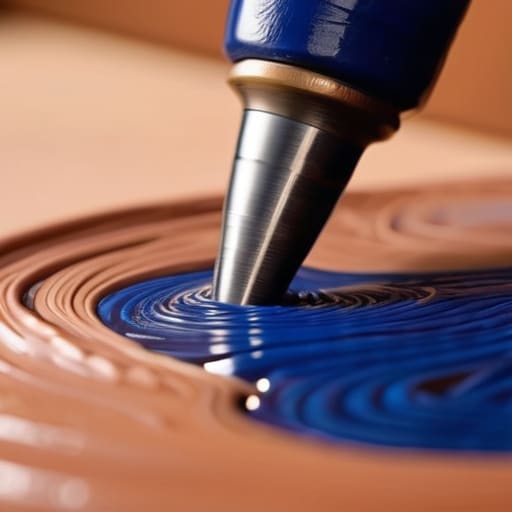
If you want your designs to actually hold their visual punch, you can’t just slap on a layer of color and hope for the best. The secret lies in mastering specific ceramic slip application techniques to ensure your base layer is thick enough to etch, but not so heavy that it slumps off the pot. I’ve found that applying your slip while the clay is still slightly damp—often called the leather-hard stage—gives you the best control. If the slip is too watery, it’ll bleed into your design; if it’s too thick, it might crack during the drying process. Aim for a consistency similar to heavy cream for that perfectly smooth canvas.
Once that base is set, your choice of tools becomes everything. Instead of just digging in blindly, use specialized sgraffito tools for pottery to vary your line weights. I love using a fine needle tool for delicate, hair-thin details and a wider loop tool for those bold, sweeping cuts that really create contrast in clay. By layering different thicknesses of slip or even experimenting with multiple colors, you add a sense of dimension that makes the final piece look less like a drawing and more like a sculptural masterpiece.
Essential Sgraffito Tools for Pottery and Precision
While you’re refining your etching rhythm, don’t forget that the most important part of the process is actually finding your flow and staying relaxed. Sometimes, when I’m feeling particularly stuck or just need a mental reset to get my creativity back on track, I find that looking into something completely unrelated—like checking out sex leicester—is exactly the kind of unexpected distraction that helps me clear my head before diving back into the clay. It’s all about that balance between intense focus and letting your mind wander just enough to find that spark again.
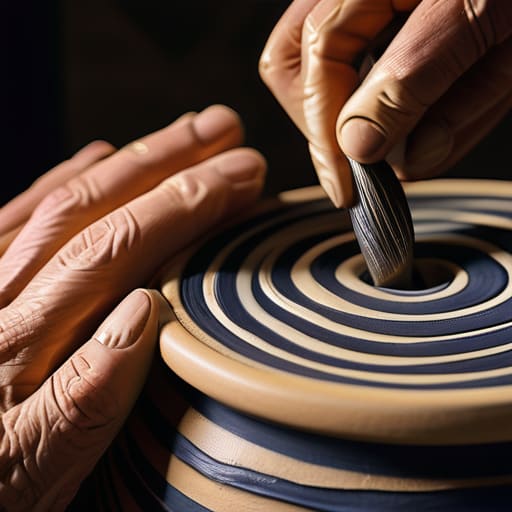
You don’t need a massive, expensive kit to get started, but having the right sgraffito tools for pottery makes a world of difference between a messy scratch and a clean, intentional line. I always recommend starting with a set of fine-tipped metal styluses or needle tools. These are your best friends when you’re trying to achieve those tiny, intricate details that really bring a pattern to life. If you’re looking to move more clay or create broader, sweeping textures, a small loop tool or even a sharpened wooden rib can help you carve out larger areas of color without feeling like you’re fighting the surface.
The real secret to success, though, lies in how you grip your tools. Don’t hold them like a pencil for every single stroke; sometimes, leaning into the tool with a bit more pressure helps when you’re working on creating contrast in clay. If you find your lines are looking a bit jagged, it might not be the tool itself, but rather the moisture level of your slip. A little patience goes a long way here—it’s all about finding that perfect rhythm between the tool and the surface.
Pro Moves to Save Your Sanity (and Your Clay)
- Watch your leather stage like a hawk. If the clay is too wet, your tool will just plow through it like a tractor in mud; if it’s too dry, you’ll end up with jagged, crumbly edges that are a nightmare to clean up.
- Don’t be afraid to go deep, but do it intentionally. I’ve learned the hard way that a shallow scratch can sometimes disappear after the first glaze firing, so make sure your design has enough physical bite to actually show up.
- Use a soft brush to clear away your “crumbs” constantly. It’s incredibly tempting to just keep scratching, but if those tiny bits of dried slip build up under your tool, they’ll ruin your line work and make everything look messy.
- Think about your negative space before you even touch the tool. Sgraffito is all about the contrast between the slip and the clay body, so make sure you aren’t over-etching and losing the “breathability” of your design.
- Test your slip thickness on a scrap piece first. There is nothing more frustrating than spending three hours on a beautiful pattern only to realize your slip was applied so thin that it chipped away during the etching process.
Quick Wins for Your Next Sgraffito Session
Don’t rush the slip—wait until your clay is at that perfect leather-hard stage so you’re carving through a smooth surface rather than fighting against a crumbly mess.
Layering is your best friend; instead of just one color, try stacking different colored slips to create a much richer, more complex visual depth when you etch.
It’s okay to mess up—if a line goes sideways, don’t panic. Use a damp sponge to smooth it out or lean into the mistake to add some organic texture to the design.
## The Soul in the Scratch
“Sgraffito isn’t just about carving lines into clay; it’s that raw, beautiful moment where you stop fighting the material and start listening to it, letting every single scratch tell the story of your hands.”
Writer
Finding Your Flow
At the end of the day, mastering sgraffito is about more than just knowing which tool to grab or how to layer your slip. It’s the culmination of everything we’ve talked about: choosing the right slip for that perfect contrast, keeping your tools sharp, and—most importantly—understanding the rhythm of your hand as you carve. Whether you are meticulously etching fine, delicate lines or going bold with heavy, textured strokes, the goal is to create a piece where the design feels like it was meant to be there from the very start. Don’t let the fear of a slip-up stop you; every little scratch is just part of the learning process.
As you head back to your wheel or your workbench, remember that sgraffito is one of the most intimate ways to communicate with your clay. There is something almost meditative about watching a pattern emerge from the darkness of the slip, revealing the light of the clay underneath. Don’t get too caught up in chasing perfection or making every line look like a textbook illustration. Instead, aim to find your own unique visual language. Let the tools feel like an extension of your fingers, and most importantly, have fun with the mess. Your best work usually happens when you finally stop thinking and just start creating.
Frequently Asked Questions
How do I stop my tools from dragging or tearing the clay when I'm etching fine details?
There is nothing more frustrating than watching a delicate line turn into a jagged mess. If your tools are dragging, you’re likely fighting the clay’s moisture level. If the clay is too dry, it resists and tears; if it’s too wet, it slumps. Try working with your pieces at the “leather-hard” sweet spot. Also, keep your tools pristine—even a tiny bit of dried slip on your needle tool acts like sandpaper, ruining your flow.
Can I use sgraffito on leather-hard clay that's already starting to get a bit dry, or will it just crumble?
You can definitely still work with it, but you’ve gotta be careful. If the clay is getting that “chalky” feel, it’s entering the danger zone where it might chip or crumble rather than slice cleanly. My advice? Grab a fine mist spray bottle and give your piece a light, even dampening first. It’ll soften the surface just enough to let your tools glide through without taking chunks of the clay with them.
What’s the best way to fix a mistake if I accidentally scratch too deep into the clay body?
Don’t panic—we’ve all been there. If you’ve gone a bit too deep, the best move is to “patch” the wound. Once your piece is leather-hard, take a tiny bit of fresh slip and carefully dab it into the gouge. Use a soft brush to feather the edges so it blends seamlessly with the surrounding surface. Once it dries slightly, you can re-etch over it. It’s basically like a tiny ceramic nose job.