I still remember the day I decided to take the plunge and start harvesting rainwater – it was a game-changer for my garden and my water bill. I was tired of watching precious rainwater go down the drain, literally. That’s when I discovered the joys of a guide to building a DIY rain barrel system. It’s amazing how something so simple can be so effective. The common myth that building a rain barrel system is complicated and expensive is just that – a myth.
In this article, I’ll share my personal experience and provide you with honest and practical advice on how to build your own DIY rain barrel system. You’ll learn how to collect and store rainwater, reduce your water consumption, and give your plants the best chance to thrive. I’ll walk you through the entire process, from choosing the right materials to installing and maintaining your system. By the end of this guide, you’ll be equipped with the knowledge and confidence to start harvesting rainwater like a pro. So, let’s get started on this DIY journey and make the most of those rainy days!
Table of Contents
- Guide Overview: What You'll Need
- Step-by-Step Instructions
- A Guide to Building a Diy Rain Barrel System
- 5 Essential Tips for a Successful DIY Rain Barrel System
- Key Takeaways for a Successful DIY Rain Barrel System
- Harvesting Wisdom
- Wrapping Up Your DIY Rain Barrel Journey
- Frequently Asked Questions
Guide Overview: What You'll Need

Total Time: 4 hours 30 minutes
Estimated Cost: $50 – $100
Difficulty Level: Intermediate
Tools Required
- Drill (with screwdriver and drill bits)
- Jigsaw (for cutting plastic or metal)
- Wrench (for tightening and loosening fittings)
- Teflon tape (for sealing threaded connections)
- Level (for ensuring proper installation)
- Measuring tape (for measuring and marking pipes)
- Pliers (for gripping and bending small pipes)
- Safety glasses (for protecting eyes from debris)
Supplies & Materials
- 55-gallon plastic barrel (food-grade and clean)
- 3/4 inch hose (for connecting barrel to downspout)
- 1 inch PVC pipe (for overflow and drain)
- PVC fittings (elbows, tees, and couplers)
- Rain barrel kit (optional, but recommended)
- 2 inches x 4 inches lumber (for building a stand or support)
- Wood screws (for assembling the stand)
- Waterproof glue (for sealing any gaps or holes)
- Screen or mesh (for keeping debris out of the barrel)
Step-by-Step Instructions
- 1. First, let’s start with the basics: gathering all the necessary materials for our DIY rain barrel system. You’ll need a large, food-grade plastic barrel, a drill, a drill bit, and some PVC pipes and fittings. Don’t worry if you’re not familiar with these terms; I’ll guide you through each step. Make sure to choose a barrel that’s suitable for collecting and storing rainwater, and always opt for a food-grade material to ensure the water remains safe for use in your garden.
- 2. Next, prepare your barrel by cleaning it thoroughly. This is a crucial step to prevent any contamination of the collected rainwater. Use a mixture of warm water and mild detergent to scrub the inside and outside of the barrel, and then rinse it with plenty of clean water. Once you’ve cleaned the barrel, let it dry completely before moving on to the next step. This will help prevent any bacterial growth that might affect the quality of the collected water.
- 3. Now, it’s time to create the inlet for your rain barrel system. This is where the rainwater will flow into the barrel from your roof’s downspout. You’ll need to drill a hole in the top of the barrel, just below the rim, and attach a PVC pipe that connects to your downspout. Make sure the hole is large enough to accommodate the pipe, but not so large that it compromises the structural integrity of the barrel. Use a PVC cement to secure the pipe in place, ensuring a watertight seal.
- 4. The next step is to add an overflow valve to your rain barrel system. This is an essential component that will prevent the barrel from overflowing during heavy rainfall. You can purchase a pre-made overflow valve or create your own using a PVC elbow and some additional piping. The key is to ensure that the valve is set up to divert excess water away from the barrel, preventing erosion and damage to the surrounding area. Choose a location for the valve that’s easily accessible for maintenance and inspection.
- 5. With the inlet and overflow valve in place, it’s time to add a spigot to your rain barrel system. This will allow you to easily access the collected rainwater for watering your plants or washing your car. You’ll need to drill another hole in the side of the barrel, just above the bottom, and attach a PVC pipe with a spigot or valve. Use Teflon tape to create a watertight seal around the threads, and make sure the spigot is securely attached to the barrel.
- 6. Now that your rain barrel system is taking shape, it’s time to think about mosquito control. Standing water can be a breeding ground for mosquitoes, so it’s essential to take steps to prevent this. You can add a few drops of dish soap or oil to the water to prevent mosquito larvae from developing. Alternatively, you can install a mosquito screen over the inlet to keep these pesky insects out. Whichever method you choose, make sure to regularly inspect your rain barrel system to ensure it remains mosquito-free.
- 7. Finally, it’s time to connect your rain barrel system to your downspout. This is the final step in creating a fully functional system. Use a flexible hose or downspout diverter to connect the downspout to the inlet of your rain barrel. Make sure the connection is secure and watertight, and that the hose or diverter is easily removable for maintenance and cleaning. With this last step complete, your DIY rain barrel system is ready to start collecting and storing rainwater for all your non-potable needs.
A Guide to Building a Diy Rain Barrel System
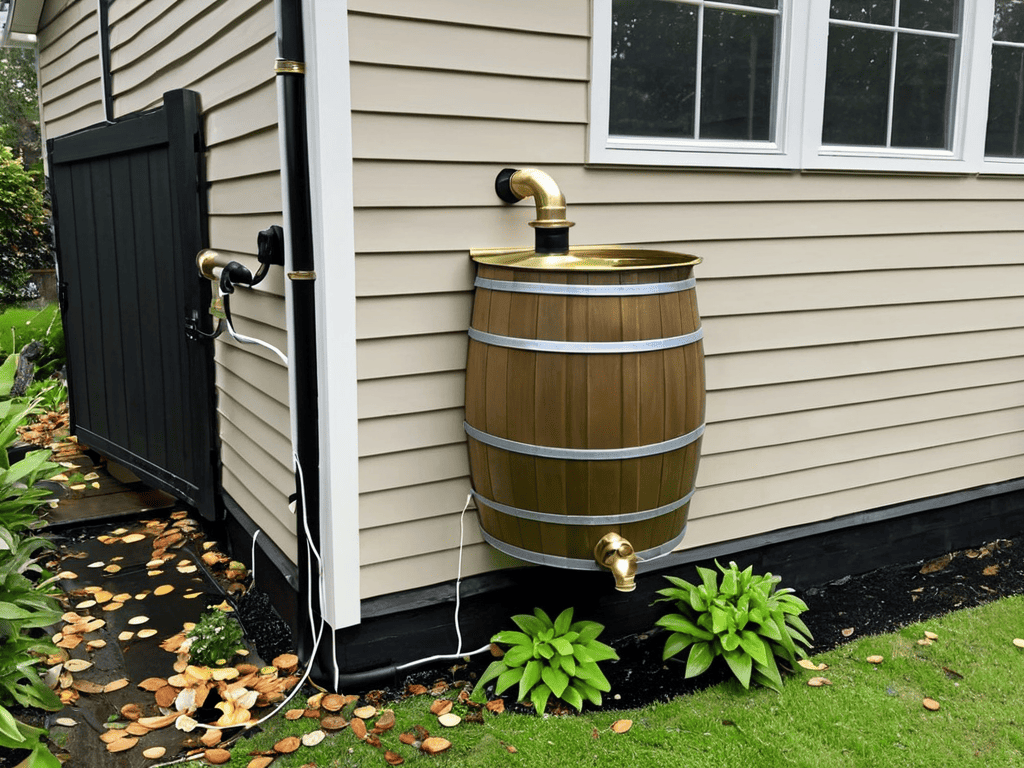
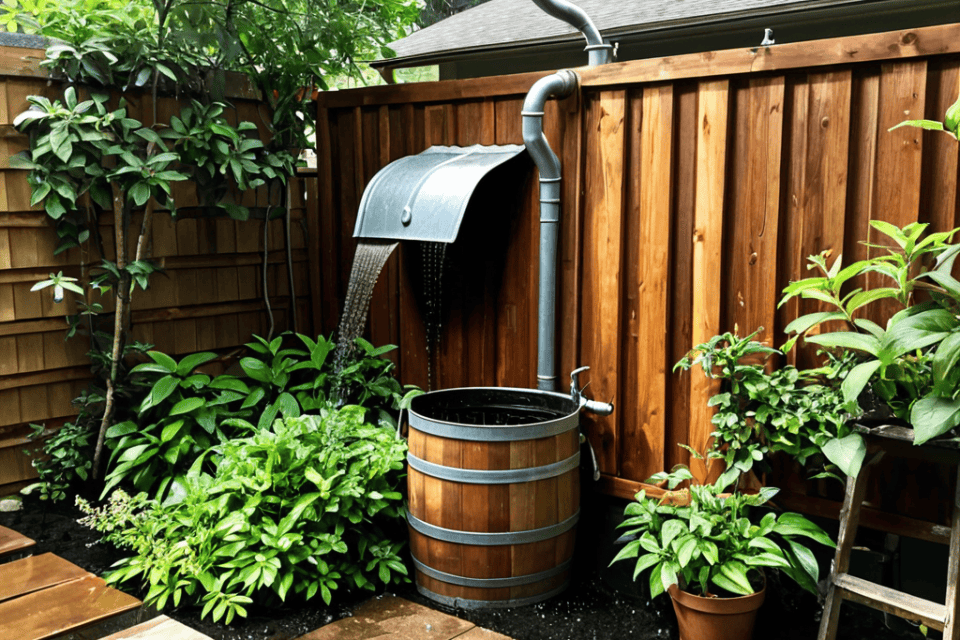
When it comes to rain barrel installation tips, it’s essential to consider the placement of your barrel. Ideally, you want to position it under a downspout to maximize water collection. Also, make sure the barrel is level and stable to prevent it from tipping over. This will ensure a smooth and efficient water collection process.
In addition to proper placement, using the best materials for rain barrels is crucial for durability and safety. Look for food-grade plastic or metal barrels that are specifically designed for rainwater collection for gardening. These materials are resistant to corrosion and can withstand the elements. Moreover, consider installing a first flush device to divert any debris or contaminants that may be present in the initial flow of water.
As you’re setting up your DIY rain barrel system, don’t forget to consider the bigger picture of water conservation and sustainability in your community. If you’re looking for like-minded individuals to share tips and ideas with, you might want to check out local groups or online forums focused on environmental initiatives – for instance, if you’re in the Stuttgart area, you can find some great resources by visiting sextreffen stuttgart, which often hosts or promotes events and discussions on eco-friendly living, including water conservation workshops. By connecting with others who share your passion for sustainable living, you can gain new insights and inspiration to take your DIY projects to the next level.
Regular rain barrel maintenance and upkeep is also vital to ensure the system runs smoothly. Check the barrel regularly for any blockages or damage, and clean it out as needed. By following these tips, you can enjoy a reliable and efficient DIY rainwater harvesting system that will provide you with a steady supply of water for your gardening needs.
Best Materials for Diy Rainwater Harvesting Systems
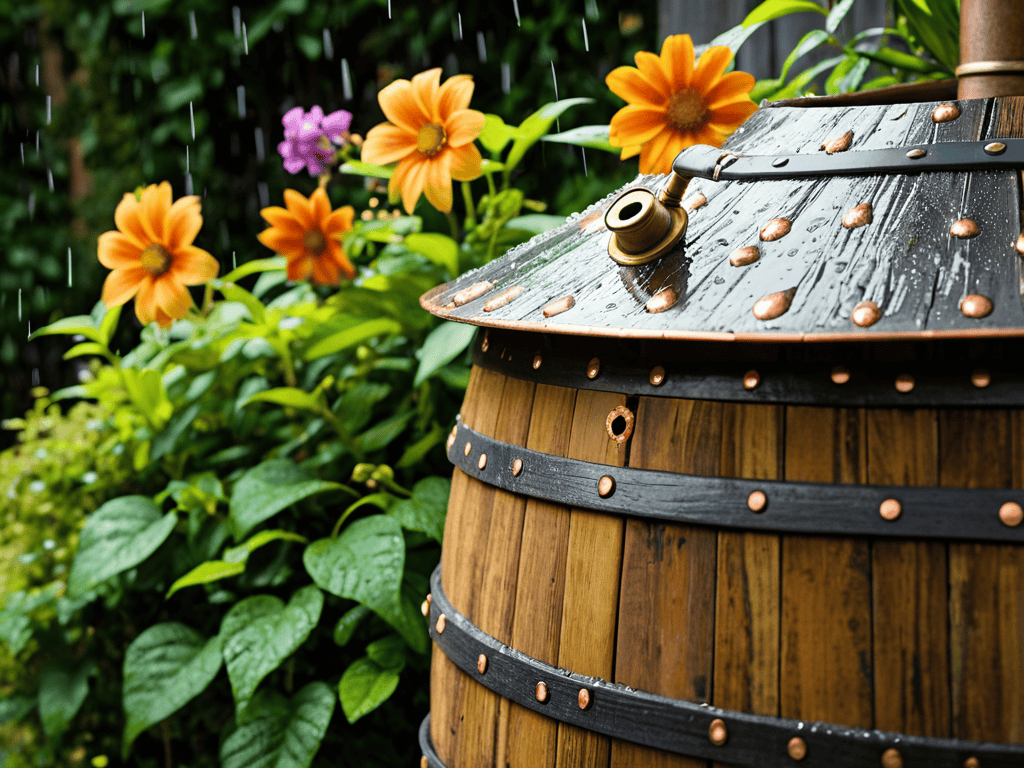
When it comes to building your DIY rainwater harvesting system, the materials you choose are crucial. You’ll want to select a food-grade plastic barrel that’s durable and resistant to UV light. Avoid using barrels that previously stored chemicals or other contaminants. For the spigot and hose, consider using brass or PVC materials, as they’re less likely to corrode. A sturdy screen to keep debris out is also essential.
A first flush device and an overflow valve are other important components to include. They help ensure that the water collected is clean and prevent overflow. By choosing the right materials, you’ll be able to create a reliable and efficient DIY rainwater harvesting system that provides you with a steady supply of clean water for years to come.
Rain Barrel Installation Tips for Success
To ensure a seamless installation, choose a flat and level spot for your rain barrel, preferably close to the downspout. Make sure it’s also easily accessible for maintenance and watering can filling. Consider the path of sunlight and shade to prevent algae growth, and keep the barrel away from direct sunlight if possible.
Properly secure the barrel to the wall or fence to prevent it from toppling over, and use a first flush device to divert debris and contaminants from entering the barrel. This will help maintain clean water and reduce maintenance.
5 Essential Tips for a Successful DIY Rain Barrel System
- Choose the Right Location: Select a spot for your rain barrel that is close to a downspout and can be easily accessed for maintenance and water collection
- Select the Perfect Barrel: Opt for a food-grade plastic barrel that is durable, UV-resistant, and has a tight-fitting lid to prevent mosquito breeding and debris entry
- Install a Mosquito-Proof Screen: Add a fine-mesh screen to the top of your barrel to keep mosquitoes and other insects out, ensuring the water remains clean and safe for use
- Use a First Flush Device: Install a first flush device to divert the first flow of water from the roof, which may contain debris and contaminants, and only collect clean water in your barrel
- Regularly Maintain Your System: Check your rain barrel system regularly for clogs, clean the screen and barrel as needed, and ensure the water is free of contaminants to keep your system running smoothly and safely
Key Takeaways for a Successful DIY Rain Barrel System
Harvesting rainwater can significantly reduce your water bills and help with water conservation, making it a great eco-friendly project for your home
Proper installation and maintenance of your DIY rain barrel system are crucial to ensure clean water collection and minimize the risk of mosquito breeding
Choosing the right materials, such as food-grade plastic barrels and rust-resistant hardware, is essential for a safe and durable rainwater harvesting system
Harvesting Wisdom
As we collect the rains, we’re not just gathering water, we’re gathering moments of self-sufficiency, of connection to the earth, and of a simpler, more meaningful way of living.
Eleanor Waters
Wrapping Up Your DIY Rain Barrel Journey
As we conclude this guide to building a DIY rain barrel system, let’s take a moment to recap the key elements that will make your project a success. From choosing the right materials to installing your system with ease, we’ve covered it all. Remember to always consider the best practices for rainwater harvesting, including using a first flush device and keeping your system clean and well-maintained. By following these simple steps and tips, you’ll be well on your way to collecting and conserving precious rainwater in no time.
Now that you’ve completed your DIY rain barrel system, take a step back and admire your handiwork – you’ve not only created a functional piece of your home’s water management system, but you’ve also taken a significant step towards reducing your environmental footprint. As you watch the rainwater flow into your barrel, remember that every drop counts, and the sense of accomplishment you feel is just the beginning of a sustainable journey that will continue to inspire and motivate you to make a positive impact on our planet.
Frequently Asked Questions
How often should I clean and maintain my DIY rain barrel system to ensure water quality?
To keep your DIY rain barrel system in top shape, clean it every 3-6 months. Check for debris, sediment, and mosquito breeding. Regularly inspect the first flush device, gutters, and downspouts to ensure proper water flow. Give your barrel a good scrub with a non-toxic cleaner, and rinse thoroughly to maintain water quality.
Can I use any type of plastic barrel for rainwater harvesting, or are there specific requirements?
Not all plastic barrels are created equal for rainwater harvesting. You’ll want to use a food-grade plastic barrel that’s specifically designed for water storage, like a former olive or pickle barrel. Avoid using barrels that previously held chemicals or other contaminants, as they can leach into the water. Look for barrels made from HDPE (high-density polyethylene) or BPA-free plastic for safe and clean water storage.
How do I ensure that my DIY rain barrel system is properly secured and won't tip over in strong winds?
To keep your DIY rain barrel system stable, use heavy-duty anchors or concrete blocks to weigh it down, and consider strapping it to a fence or wall for extra security against strong winds.