
I still remember the first time I tried to record a video for my blog – the harsh overhead light made me look like a ghost. That’s when I realized that proper lighting is not just a luxury, but a necessity for any serious content creator. If you’re looking for a beginner’s guide to lighting for video, you’ve come to the right place. I’ve spent countless hours testing different lighting setups, and I’m here to share my findings with you.
In this article, I’ll cut through the hype and give you practical advice on how to light your videos like a pro. You’ll learn how to choose the right equipment, set up a basic lighting kit, and adjust your lighting to fit different scenarios. I’ll also share some common mistakes to avoid and provide you with a step-by-step guide to help you improve your video production skills. Whether you’re a blogger, vlogger, or entrepreneur, this guide will help you create high-quality videos that engage and inspire your audience. So, let’s get started and dive into the world of video lighting.
Table of Contents
- Guide Overview: What You'll Need
- Step-by-Step Instructions
- A Beginners Guide to Lighting for Video
- Shining a Light on the Basics: 5 Essential Tips for Beginner Video Lighting
- Key Takeaways for Better Video Lighting
- Lighting Truths
- Conclusion: Lighting Your Path to Video Success
- Frequently Asked Questions
Guide Overview: What You'll Need
Total Time: 1 hour 30 minutes
Estimated Cost: $50 – $100
Difficulty Level: Easy
Tools Required
- Light Meter (optional)
- Clamp Lamp (for positioning lights)
- Tripod (for stabilizing cameras)
Supplies & Materials
- Softbox Lights (at least 1)
- Natural Light Sources (e.g., near a window)
- Diffusion Panels (for softening light, 12 inches x 12 inches)
Step-by-Step Instructions
- 1. First, let’s get started with the basics: understanding the types of lighting you’ll need for your video production. You’ll need to invest in a combination of key, fill, and backlighting to create a well-rounded and professional-looking setup. I’ve found that a good starting point is to use a mix of natural and artificial light sources to create a balanced look.
- 2. Next, you’ll need to choose the right lighting equipment for your setup. This includes deciding on the type of lights to use, such as LED panels, softboxes, or sidelights. I’ve tested a variety of options and found that investing in quality is crucial to achieving a professional look. Don’t be tempted to skimp on cheap alternatives, as they can often produce harsh or unflattering light.
- 3. Now that you have your equipment, it’s time to think about lighting placement. This is where most beginners go wrong, as it’s easy to fall into the trap of placing lights in a way that creates unflattering shadows or harsh highlights. To avoid this, try using a lighting diagram to plan out your setup and ensure that your lights are positioned in a way that creates a balanced and natural-looking effect.
- 4. With your lights in place, it’s time to start thinking about color temperature. This refers to the warmth or coolness of your light, and can have a big impact on the overall mood and atmosphere of your video. I’ve found that experimenting with different color temperatures can be a great way to add depth and interest to your footage, so don’t be afraid to try out different options and see what works best for your scene.
- 5. Once you’ve got your lighting setup dialed in, it’s time to start thinking about lighting intensity. This refers to the overall brightness of your light, and can be adjusted using a variety of techniques such as dimming, diffusing, or flagging. I’ve found that fine-tuning your lighting intensity is crucial to achieving a natural-looking effect, so take the time to get it just right.
- 6. Now that you’ve got your lighting setup and intensity dialed in, it’s time to start thinking about lighting contrast. This refers to the balance between light and dark areas of your scene, and can be used to create a sense of depth and dimensionality. I’ve found that playing with lighting contrast can be a great way to add visual interest to your footage, so don’t be afraid to experiment and see what works best for your scene.
- 7. Finally, it’s time to put everything together and start testing your lighting setup. This is where the rubber meets the road, and you’ll be able to see firsthand how your lighting choices are affecting the overall look and feel of your video. I’ve found that iterating and refining your lighting setup is a crucial part of the process, so don’t be afraid to make adjustments and try out new things until you get the look you’re going for.
A Beginners Guide to Lighting for Video
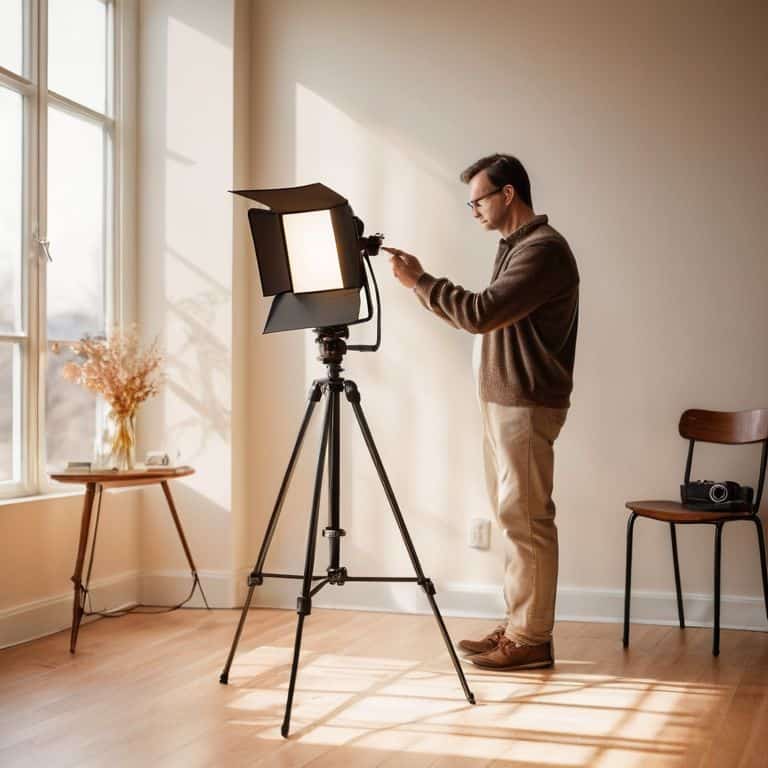
When it comes to basic lighting setups for beginners, it’s essential to keep things simple. I’ve found that using available light can be a great way to start, especially when shooting outdoors or near a window. However, when that’s not possible, led panel lights for video production can be a cost-effective and easy-to-use alternative. These lights are compact, energy-efficient, and often come with adjustable color temperatures, making them a great addition to any beginner’s lighting kit.
To add depth to your video, consider using backlighting techniques. This involves positioning a light behind your subject to create a subtle highlight around their edges. Not only does this help separate them from the background, but it also adds a professional touch to your footage. When combined with key light positioning techniques, you can create a well-balanced and visually appealing lighting setup that enhances your subject and draws the viewer’s attention.
In my experience, color temperature for video lighting is often overlooked, but it can make a significant difference in the mood and atmosphere of your video. By adjusting the color temperature of your lights, you can create a warm and cozy ambiance or a cool and modern look. I’ve experimented with different color temperatures in my own videos, and it’s amazing how much of an impact it can have on the overall feel of the footage.
Cutting Through Hype Basic Lighting Setups
When it comes to basic lighting setups, I’ve seen too many creators get caught up in the hype. They think they need a fancy, expensive kit to get started. But let’s get real, a simple three-point lighting setup is all you need to begin with. This consists of a key light, fill light, and backlight – and you can achieve this with just a few well-placed lamps or a basic lighting kit.
I’ve tested numerous setups, and my scorecard shows that even the most basic configurations can produce impressive results. Don’t believe the marketing jargon; you don’t need to break the bank to get started with decent lighting. A basic setup can be had for under $200, and it’s a great way to learn the fundamentals before investing in more advanced gear.
Unlocking Depth Backlighting and Color Temperature
To add depth to your scene, consider incorporating backlighting. This involves placing a light source behind your subject, which helps separate them from the background and creates a more nuanced visual appeal. I’ve experimented with various backlighting setups, and I can attest that even a basic implementation can significantly enhance your video’s production value. When it comes to color temperature, it’s essential to understand how different temperatures can affect the mood of your scene. Warm colors (around 2700K-3000K) can create a cozy atmosphere, while cool colors (around 5000K-6500K) can produce a more modern, sleek look.
Shining a Light on the Basics: 5 Essential Tips for Beginner Video Lighting

- Start by understanding the fundamentals of the exposure triangle: aperture, shutter speed, and ISO, and how they interact with your lighting setup
- Invest in a basic lighting kit that includes a key light, fill light, and backlight to create a foundational setup for most video productions
- Pay attention to color temperature: match your lighting to the scene’s ambiance, using warm whites for cozy settings and cool blues for modern, sleek environments
- Experiment with backlighting to add depth and dimension to your subjects, but be cautious not to overdo it, as harsh backlights can create unflattering silhouettes
- Remember, lighting is not just about illuminating your subject, but also about setting the mood and atmosphere of your video, so choose your lighting scheme wisely to enhance your narrative
Key Takeaways for Better Video Lighting
Proper lighting is not just about throwing money at equipment, but understanding how to use basic setups like three-point lighting to enhance your video’s visual appeal
Backlighting and color temperature play a crucial role in adding depth and realism to your videos, so don’t overlook investing time in mastering these techniques
Cut through the marketing noise and focus on the essentials: with a solid grasp of lighting fundamentals, you can create professional-looking videos without breaking the bank on unnecessary gear
Lighting Truths
If you think lighting is just about slapping some softboxes on a stand, you’re about to waste a lot of time and money – the truth is, mastering lighting is what separates YouTube nobodies from cinematic storytellers.
Marco Vettel
Conclusion: Lighting Your Path to Video Success
In this beginner’s guide to lighting for video, we’ve covered the fundamentals of lighting setups and explored how to unlock depth in your videos through backlighting and color temperature. We’ve also discussed the importance of investing in proper lighting equipment, rather than relying on harsh overhead lights. By following these steps and tips, you’ll be well on your way to creating high-quality, professional-looking videos that engage and captivate your audience. Remember, good lighting is key to making your videos stand out, and it’s worth taking the time to get it right.
As you continue on your video production journey, keep in mind that practice makes perfect. Don’t be afraid to experiment with different lighting setups and techniques to find what works best for you and your content. With patience, persistence, and a willingness to learn, you can create videos that truly shine. So, go ahead, take the first step, and start lighting your path to video success. With the right lighting, you’ll be amazed at how your videos can transform and the impact they can have on your audience. Happy filming!
Frequently Asked Questions
What are the most essential lighting equipment pieces I need to get started with basic video production?
Honestly, you don’t need much to get started. A basic kit with a key light, fill light, and backlight will cover your bases. I recommend a decent LED panel for your key, a softbox for fill, and a small LED for backlight. That’s it. Don’t fall for the hype, these essentials will get you pro-looking results without breaking the bank.
How do I balance the color temperature of my lighting setup to achieve a natural look?
To balance color temperature, I swear by the 5600K benchmark – it’s the sweet spot for natural light. I’ve logged it in my spreadsheet, and trust me, it makes a difference. Mix warm and cool tones by combining LED panels with softbox lights or sidelights, and adjust to taste. My scorecard gives this approach a solid 8/10 for ‘Hype vs. Reality’.
What are some common mistakes beginners make when setting up their lighting for video and how can I avoid them?
Let’s get real, most beginners over-rely on a single light source or neglect to consider their background. I’ve seen it time and time again – harsh shadows, unflattering colors. To avoid this, invest in a basic three-point lighting setup and experiment with different color temperatures to find what works for your scene.