I still remember the day I decided to create a DIY gallery wall on a budget in my tiny apartment. I was determined to turn my blank walls into a masterpiece without breaking the bank. But, as I dived into the world of DIY decorating, I was bombarded with generic tips and overpriced solutions that left me feeling frustrated and defeated. The truth is, most DIY gallery wall tutorials are either too complicated or too expensive, making it seem impossible to achieve a stunning wall without spending a fortune.
As someone who’s been in your shoes, I want to assure you that creating a beautiful gallery wall on a budget is entirely possible. In this article, I’ll share my personal experience and practical tips on how to create a DIY gallery wall on a budget. You’ll learn how to choose the right frames, select the perfect pictures, and arrange them in a way that tells a story. I’ll cut through the noise and provide you with honest, no-hype advice on how to create a stunning gallery wall that reflects your personality, without breaking the bank.
Table of Contents
- Guide Overview: What You'll Need
- Step-by-Step Instructions
- Budget Gallery Wall Secrets
- Budget-Friendly Bliss: 5 Essential Tips for a DIY Gallery Wall
- Key Takeaways for a Stunning Gallery Wall
- The Art of Budget-Friendly Curation
- Bringing it all Together: Your Budget Gallery Wall Awaits
- Frequently Asked Questions
Guide Overview: What You'll Need
Total Time: 2 hours 30 minutes
Estimated Cost: $20 – $50
Difficulty Level: Easy
Tools Required
- Level (for ensuring straight hangs)
- Hammer (for tapping nails into place)
- Tape Measure (for measuring wall space)
- Pencil (for marking wall and frame positions)
- Utility Knife (with extra blades)
Supplies & Materials
- Picture Frames (various sizes and styles)
- Frame Hanging Kits (including nails, screws, or adhesive strips)
- Wall Anchors (optional, for heavy frames)
- Decorative Items (such as artwork, prints, or mirrors)
- Ruler (12 inches long, for aligning frames)
Step-by-Step Instructions
- 1. First, let’s start by gathering our materials, which include a variety of frames in different shapes and sizes, a hammer, nails, a level, and a measuring tape. We want to make sure we have everything we need before we begin, so take some time to _scour your local thrift stores_ and garage sales for unique and affordable frames.
- 2. Next, we need to decide on a _unifying theme_ for our gallery wall, whether it’s a collection of family photos, artwork, or a mix of both. This will help us choose the right frames and create a cohesive look. Consider the color scheme and style of your room, as well as the mood you want to create with your gallery wall.
- 3. Now it’s time to plan the layout of our gallery wall. We can do this by laying out our frames on the floor or on a large table, and experimenting with different arrangements until we find one that works. Take a photo of your layout so you can reference it later, and don’t be afraid to _mix and match_ different frame sizes and shapes.
- 4. With our layout planned, it’s time to start hanging our frames. Begin by locating the wall studs in your area, and use a level to ensure your frames are straight. Use a measuring tape to measure the distance between each frame, and _double-check your math_ to avoid any mistakes.
- 5. As we hang each frame, we need to make sure they’re securely attached to the wall. Use a hammer and nails to hang the frames, and consider using a _template or stencil_ to help you place the nails in the right spot. If you’re hanging a large or heavy frame, you may want to use a sturdy anchor to prevent it from falling.
- 6. Once all of our frames are hung, it’s time to _step back and admire_ our handiwork. Take a step back and evaluate your gallery wall, making any necessary adjustments to the layout or frame placement. Consider adding some finishing touches, such as a few well-placed decorative items or a _spray of greenery_.
- 7. Finally, take some time to enjoy your creation and be proud of the fact that you created a beautiful and unique gallery wall without breaking the bank. Remember, the most important thing is to have fun and be _creative with your design_ – don’t be afraid to experiment and try new things.
Budget Gallery Wall Secrets
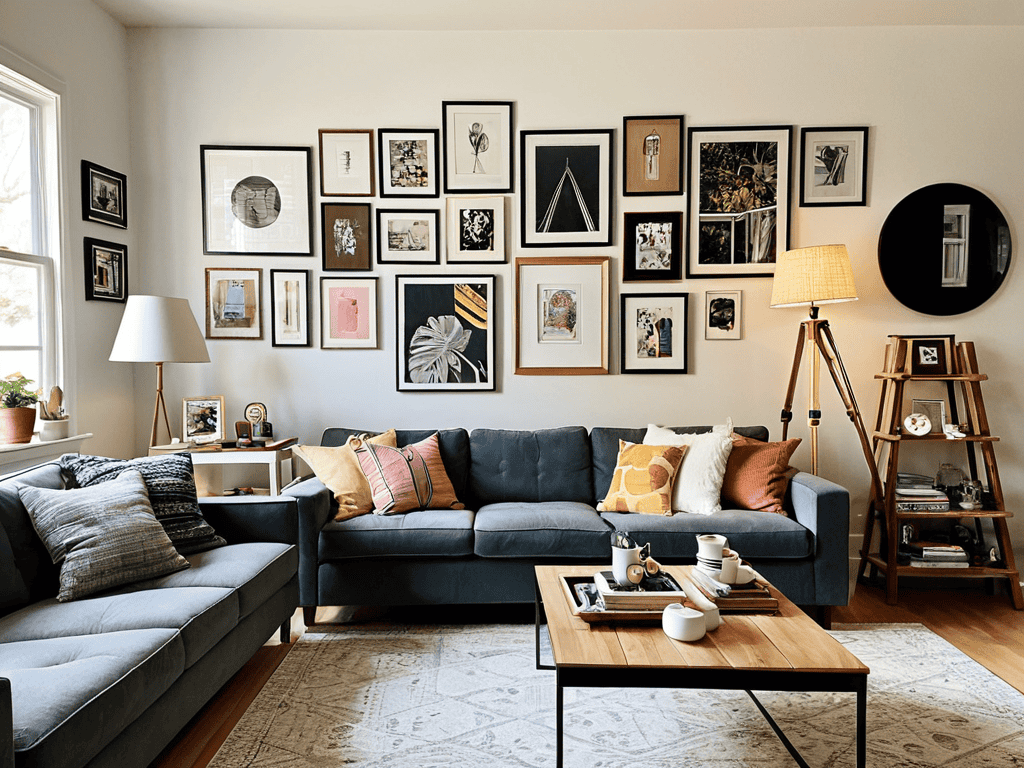
As you’re curating your collection of frames, don’t forget to think outside the box when it comes to finding the perfect pieces. You can often find unique, one-of-a-kind frames at thrift stores or estate sales, but if you’re short on time or can’t seem to find what you’re looking for, there are some amazing online resources that can help. For example, if you’re looking for a platform that offers a wide range of affordable and stylish options, you might want to check out transensex, which can be a great way to discover new and exciting pieces to add to your gallery wall. By mixing and matching different frame styles and shapes, you can create a truly eclectic and eye-catching display that reflects your personal style and adds a touch of personality to any room.
When it comes to budget friendly wall decor, one of the most important things to keep in mind is that you don’t have to break the bank to create a stunning gallery wall. Mixing frame styles and sizes can add a unique touch to your wall, and it’s easy to do on a budget by repurposing old frames or finding affordable options at thrift stores.
To take your gallery wall to the next level, consider creating a gallery wall with prints that reflect your personal style. This can be a great way to add some visual interest to your wall without overspending. You can find affordable prints online or at local art fairs, and frame them using inexpensive frames or repurposing old frames for decor.
By using command strips for hanging and experimenting with different layouts, you can create a unique wall layout that showcases your favorite pieces. Don’t be afraid to get creative and try out different arrangements until you find one that works for you. With a little patience and experimentation, you can create a beautiful and one-of-a-kind gallery wall that reflects your personal style without blowing your budget.
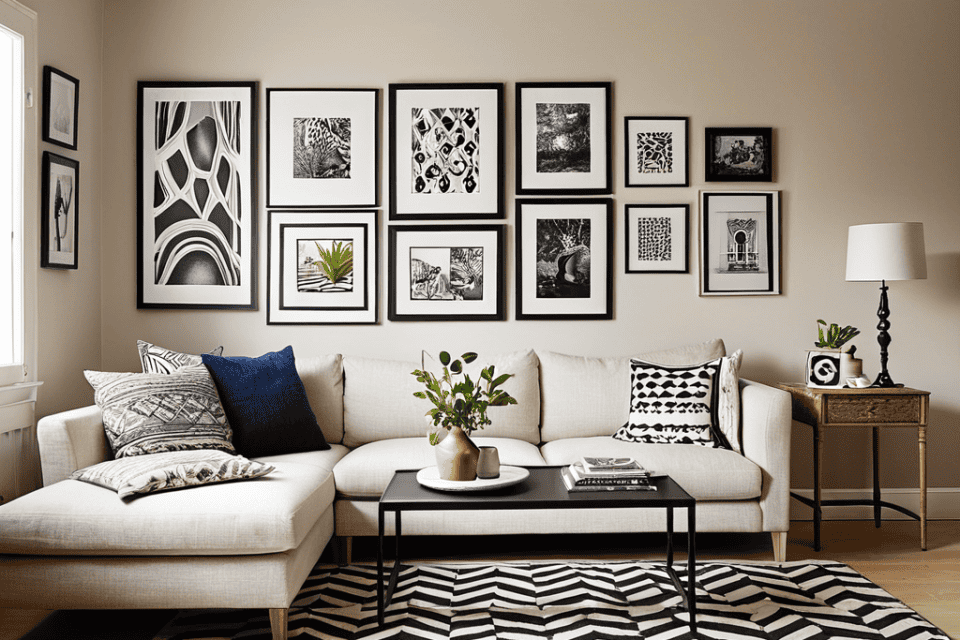
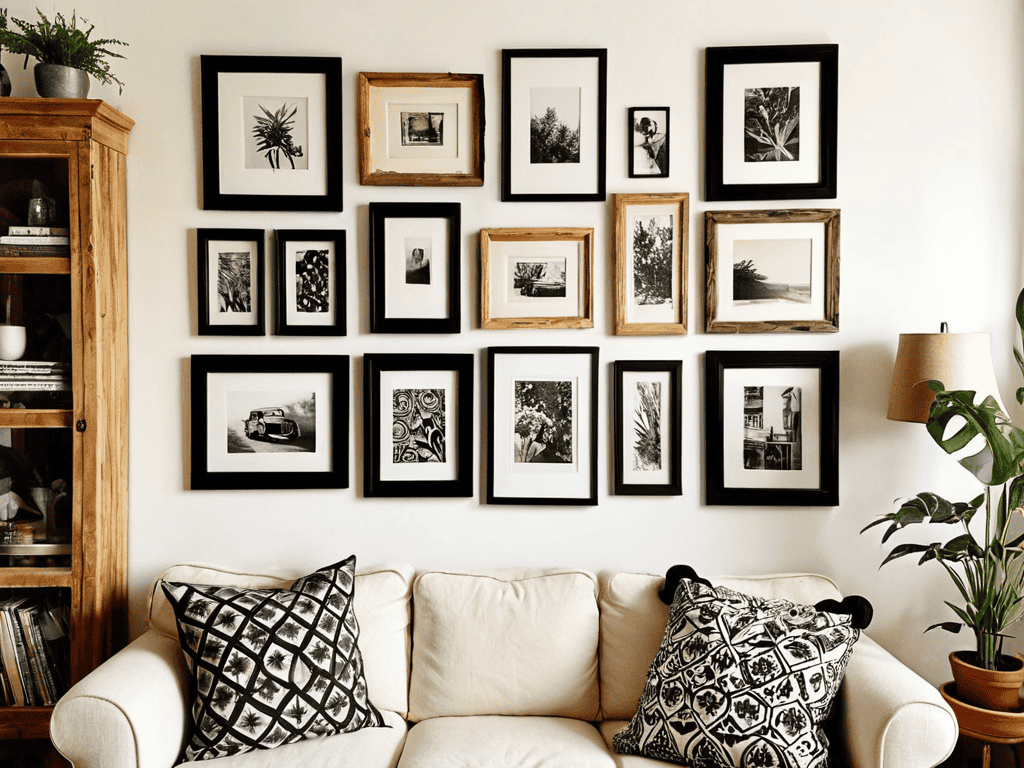
Mixing Frame Styles on Budget
Mixing frame styles can add a unique touch to your gallery wall, and it’s totally doable on a budget. Thrift stores, garage sales, and online marketplaces are treasure troves for affordable, eclectic frames. Don’t be afraid to combine different shapes, sizes, and materials – it’s all about creating a visually interesting mix.
By embracing a variety of frame styles, you’ll add depth and personality to your wall. Plus, it’s a great way to repurpose old frames you might have lying around, giving your wall a truly one-of-a-kind feel.
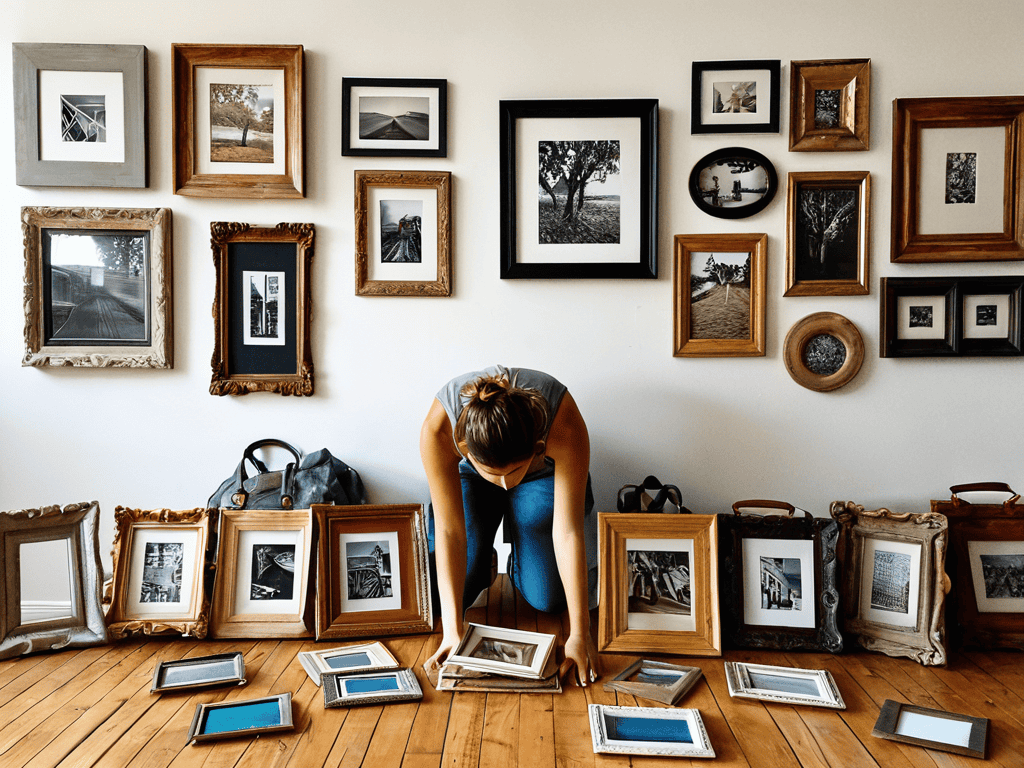
Repurposing Old Frames for Decor
One of the most creative ways to save money is by repurposing old frames. You can breathe new life into vintage or thrift store finds by giving them a fresh coat of paint or stain. This not only adds a unique touch to your gallery wall but also reduces waste. Consider scouring local flea markets, garage sales, or your own attic for hidden gems. With a little bit of TLC, these old frames can become stunning pieces that add character to your wall.
By repurposing old frames, you can also experiment with different shapes, sizes, and styles, adding depth and visual interest to your gallery wall. Plus, it’s a great way to tell a story through your decor, showcasing your personal style and history.
Budget-Friendly Bliss: 5 Essential Tips for a DIY Gallery Wall
- Start with what you’ve got: scour your home for old frames, prints, and photos to repurpose and reuse
- Shop smart: thrift stores, garage sales, and discount shops can be treasure troves for unique and affordable frames and artwork
- Get creative with layout: experiment with different arrangements and patterns to add visual interest without breaking the bank
- Print your own art: use your favorite photos or find free printables online to add a personal touch without the hefty price tag
- Keep it simple: don’t feel like you need to fill every inch of wall space – sometimes less is more, and it’s easier on your wallet too
Key Takeaways for a Stunning Gallery Wall
Combine frame styles and sizes to add visual interest to your gallery wall without overspending on matching sets
Breathing new life into old frames by repurposing them can significantly cut costs and add a unique touch to your decor
By embracing a mix-and-match approach and getting creative with frame reuse, you can achieve a professional-looking gallery wall on even the tightest of budgets
The Art of Budget-Friendly Curation
A gallery wall is not just about filling a space, it’s about telling a story with every frame, and the best stories are the ones that don’t break the bank.
Emily J. Miller
Bringing it all Together: Your Budget Gallery Wall Awaits
As we’ve explored the world of DIY gallery walls on a budget, it’s clear that with a little creativity, you can achieve a stunning visual display that reflects your personality without draining your wallet. From mixing frame styles to repurposing old frames, the key to success lies in embracing your inner artist and not being afraid to think outside the box. Repurposing and upcycling are not only budget-friendly but also add a unique touch to your decor. By following the steps and secrets outlined, you’re well on your way to creating a space that’s truly yours.
So, as you embark on this creative journey, remember that it’s not just about the end result, but about the process of self-expression. Your DIY gallery wall is a reflection of your story, your passions, and your style. Don’t be afraid to experiment, to try new things, and to make mistakes. Because in the end, it’s the imperfectly perfect touches that make your space truly special and a testament to your personal touch.
Frequently Asked Questions
What are some creative ways to arrange frames on a wall without looking cluttered?
Play with patterns, baby! Try arranging frames in a zigzag, or create a focal point with a large frame surrounded by smaller ones. You can also group frames by theme or color to add visual cohesion. And don’t be afraid to leave some breathing room – a little negative space can work wonders in avoiding clutter!
How can I ensure that my DIY gallery wall is level and evenly spaced?
To ensure your DIY gallery wall is level and evenly spaced, use a laser level and a measuring tape to mark the spots where you’ll hang your frames. You can also create a template with paper cutouts of your frames to play around with the layout before nailing anything into the wall. Trust me, it’s a game-changer!
What types of materials can I use to create a unique and budget-friendly frame for my gallery wall?
For a one-of-a-kind frame, think outside the box – literally! Consider upcycling old pallets, masonite, or even vintage windows to add a personal touch to your gallery wall. You can also repurpose fabric, maps, or music sheets as unique frame wraps for a eclectic look that’s all you.