
I still remember the first time I saw a Vertical Hydroponics Wall in action – it was like a revelation. The idea that you could grow a lush, vibrant garden in a tiny fraction of the space traditionally needed was mind-blowing. But what really struck me was how often people believe that setting up such a system is incredibly complicated and expensive. The truth is, with the right guidance, creating your own Vertical Hydroponics Wall can be surprisingly straightforward and cost-effective.
In this article, I’ll cut through the hype and share my practical, hands-on experience with building and maintaining a Vertical Hydroponics Wall. You’ll learn how to choose the right materials, design your wall for maximum yield, and troubleshoot common issues. My goal is to provide you with honest, no-nonsense advice that will help you succeed, whether you’re a seasoned gardener or just starting out. By the end of this guide, you’ll be equipped with the knowledge and confidence to create your own thriving vertical garden, and start enjoying the many benefits that come with growing your own food in even the smallest of spaces.
Table of Contents
Project Overview

Total Time: 4 hours 30 minutes
Estimated Cost: $100 – $200
Difficulty Level: Intermediate
Tools Required
- Drill ((with screwdriver and drill bits))
- Jigsaw ((for cutting PVC pipes))
- Measuring Tape
- Level ((to ensure the wall is straight))
- Pliers ((for gripping small objects))
- Utility Knife ((with extra blades))
Supplies & Materials
- 2-in x 4-in lumber ((for the frame))
- PVC pipes ((for the hydroponic system))
- Grow tubes ((6 inches in diameter))
- Rockwool cubes ((for plant growth))
- Hydroponic nutrients
- Water pump ((for circulating the nutrient solution))
- Tubing ((for connecting the water pump and pipes))
- Net pots ((for holding the plants))
- Wood screws ((for assembling the frame))
- Waterproof glue ((for sealing the pipes))
Step-by-Step Instructions
- 1. First, plan your space carefully, considering the amount of light it receives and the type of plants you want to grow. Since vertical hydroponics walls can be quite versatile, you can install them in a variety of locations, from indoor rooms to outdoor gardens. Make sure to choose a spot that receives the right amount of sunlight for your plants, and consider using grow lights if necessary.
- 2. Next, gather your materials, which should include a frame for your wall, a hydroponic system, and the plants you’ve chosen. You can buy a pre-made frame or build your own using PVC pipes or wood. The hydroponic system will depend on the type of plants you’re growing and your personal preference, but popular options include NFT (Nutrient Film Technique) and ebb-and-flow systems.
- 3. Now, assemble your frame, making sure it’s sturdy and can support the weight of your plants and the hydroponic system. If you’re using a pre-made frame, follow the manufacturer’s instructions for assembly. If you’re building your own, consider using a trellis system or a series of shelves to support your plants.
- 4. After assembling the frame, install the hydroponic system, which will provide your plants with the nutrients they need to grow. This typically involves connecting a series of tubes and pumps that deliver a nutrient-rich solution to your plants’ roots. Make sure to follow the manufacturer’s instructions for your specific system.
- 5. Once your frame and hydroponic system are in place, add your plants, making sure to space them out evenly and leave enough room for growth. You can start with seedlings or seeds, depending on your preference and the type of plants you’re growing. Consider using a variety of plants with different growth habits and textures to create a visually interesting wall.
- 6. Next, set up your irrigation system, which will deliver water and nutrients to your plants. This typically involves programming a timer and adjusting the flow rate of your pumps to ensure your plants receive the right amount of moisture. Make sure to monitor your plants’ response to the irrigation system and adjust as necessary.
- 7. Finally, monitor and maintain your vertical hydroponics wall, making sure your plants are receiving the right amount of light, water, and nutrients. This involves regularly checking the pH and nutrient levels of your hydroponic solution, pruning your plants to encourage growth, and watching for signs of pests or disease. With regular maintenance, your vertical hydroponics wall should thrive and provide you with a bountiful harvest.
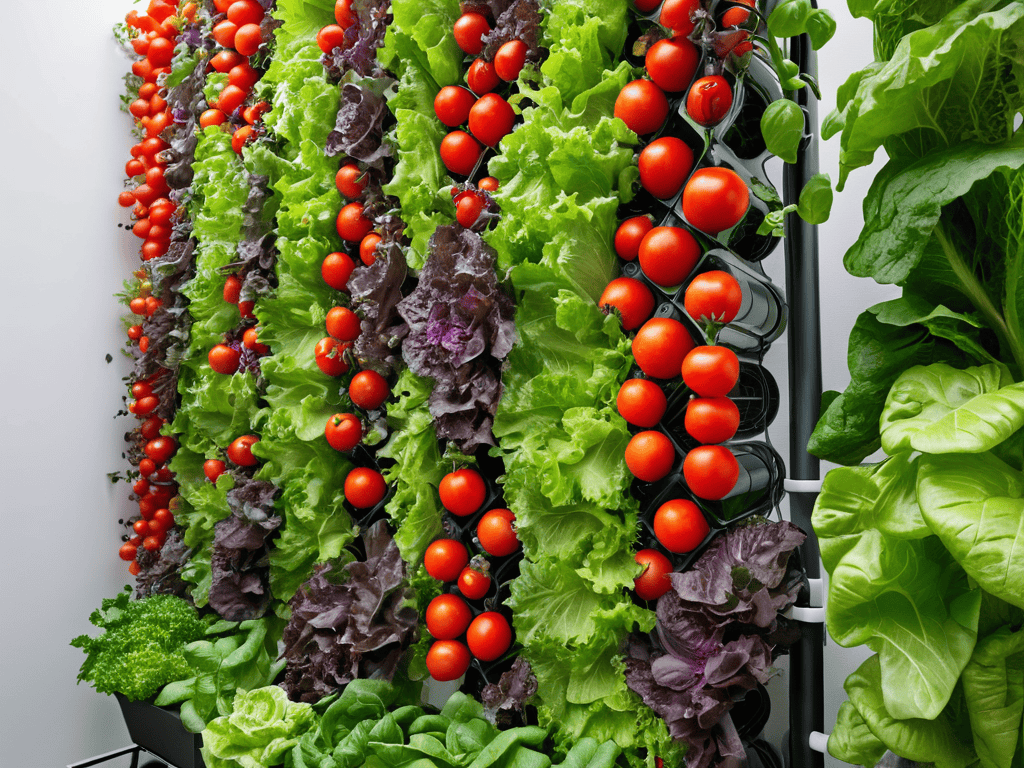
Vertical Hydroponics Wall

When it comes to creating a thriving hydroponic system design, it’s essential to consider the specific needs of your plants. This includes providing the right amount of light, water, and nutrients. In a vertical setup, space saving hydroponics becomes a major advantage, allowing you to grow more plants in a smaller area. By utilizing a trellis system or a wall-mounted planter, you can maximize your space while still providing your plants with the necessary resources.
As you start planning your vertical hydroponics wall, it’s essential to consider the overall aesthetic and functionality you want to achieve in your space. To help you visualize your design, I recommend checking out some online resources that showcase innovative hydroponic systems and space-saving solutions. For instance, if you’re in the Sydney area, you might want to explore local experts like t4m sydney for inspiration on how to create a thriving indoor garden. By looking at different designs and systems, you can get a better sense of what will work best for your specific needs and maximize your space.
To get the most out of your indoor hydroponic farming setup, it’s crucial to implement effective hydroponic nutrient management. This involves monitoring and adjusting the nutrient levels in your system to ensure optimal plant growth. By doing so, you can avoid common issues like nutrient deficiencies or over-fertilization. Additionally, indoor hydroponic farming tips such as maintaining a consistent temperature and humidity level can help create a stable environment for your plants to thrive.
In urban areas, urban hydroponic systems like vertical gardens can be a game-changer for city dwellers. Not only do they provide a sustainable way to grow your own food, but they also offer numerous vertical garden benefits, including improved air quality and aesthetic appeal. By embracing this innovative approach to gardening, you can join a community of like-minded individuals who are passionate about creating a more sustainable and food-secure future.
Hydroponic System Design Tips
When designing your hydroponic system, consider the space and resources available. A well-planned system can maximize yields and minimize maintenance. Think about the type of plants you want to grow and their specific needs. For a vertical hydroponics wall, a nutrient film technique or ebb-and-flow system can be effective.
To ensure optimal growth, balance the amount of light, water, and nutrients provided to your plants. Monitor and adjust your system regularly to prevent any issues. Proper aeration and pH management are also crucial for healthy plant growth. By carefully designing your hydroponic system, you can create a thriving and productive vertical garden.
Space Saving Hydroponics Benefits
One of the biggest advantages of a vertical hydroponics wall is its ability to save space. By growing plants upwards, you can make the most of even the smallest rooms. This is especially useful in urban areas where space is limited. Plus, it’s a great way to add some greenery to your home or office without taking up too much floor space. The space-saving benefits of vertical hydroponics walls are numerous, from maximizing crop yields in tiny areas to creating a natural, calming atmosphere in otherwise cramped spaces.
This setup allows for more plants to be grown in a smaller footprint, making it perfect for city dwellers or those with limited garden space.
Maximizing Your Harvest: 5 Essential Tips for a Thriving Vertical Hydroponics Wall
- Choose the right plants: Select varieties that are well-suited for vertical growth and can thrive in a hydroponic system, such as leafy greens, herbs, and strawberries
- Optimize your nutrient solution: Ensure that your hydroponic system is providing the right balance of nutrients for your plants, and adjust the solution as needed to promote healthy growth
- Maintain proper pH levels: Regularly monitor and adjust the pH levels in your hydroponic system to prevent stress and damage to your plants
- Provide adequate lighting: Consider the lighting needs of your plants and provide sufficient artificial or natural light to support photosynthesis and growth
- Monitor and adjust temperature: Keep an eye on the temperature in your growing space and adjust as needed to prevent extreme temperatures that can damage your plants or disrupt growth
Key Takeaways for a Thriving Vertical Hydroponics Wall
I can now create a stunning and productive vertical garden in even the smallest of spaces, perfect for urban homes and offices
By applying the right hydroponic system design tips and considering space-saving benefits, I can maximize my crop yields and minimize maintenance efforts
With a vertical hydroponics wall, I’m not only adding a touch of greenery to my space but also contributing to a more sustainable and environmentally friendly way of growing my own food
Growing Beyond Limits
A vertical hydroponics wall is not just a gardening technique, it’s a declaration of independence from traditional space constraints, allowing us to nurture life and beauty in even the most unexpected places.
Eva Greenleaf
Conclusion
As we’ve explored the world of vertical hydroponics walls, it’s clear that they offer a unique solution for urban gardeners. From the initial setup to the ongoing maintenance, we’ve covered the key steps to get you started. We’ve also delved into the hydroponic system design tips and discussed the numerous space saving hydroponics benefits that come with this innovative approach. By understanding these fundamentals, you’ll be well on your way to creating your own thriving vertical garden.
So why not take the leap and defy gravity with your very own vertical hydroponics wall? Imagine being able to grow your favorite plants in even the smallest of spaces, and enjoy the numerous benefits that come with it. As you embark on this journey, remember that the possibilities are endless, and the rewards are well worth the effort. With a little creativity and patience, you can turn any space into a lush oasis, and experience the joy of harvesting your own homegrown produce.
Frequently Asked Questions
How much maintenance is required for a vertical hydroponics wall?
Honestly, maintenance is pretty minimal – just water and nutrient checks, and occasional pruning to keep everything thriving. I’d say about 10-15 minutes a week, depending on the size of your wall. It’s super easy to manage, even for a busy person like me!
Can I use a vertical hydroponics wall to grow any type of plant?
While vertical hydroponics walls offer incredible flexibility, not all plants thrive in this setup. Leafy greens, herbs, and strawberries love the vertical life, but larger plants like tomatoes or cucumbers might need more support. Experiment with different species to find your perfect match!
What are the initial costs and long-term savings of installing a vertical hydroponics wall?
The initial investment for a vertical hydroponics wall can range from $500 to $2,000, depending on the size and materials. However, the long-term savings are substantial – you can save up to 90% on water and 50% on fertilizers, and even increase crop yields by 30%. It’s a smart investment for any urban gardener!