
Picture this: I’m crouched on a garden bench at 3 a.m., the night air smelling of soil and basil, while a lone firefly darts past a dewy rose. My cheap 50 mm lens is glued to the petal, but the shallow depth of field turns that vein pattern into a blurry mystery. That’s when I discovered Focus Stacking for Macro—not as a fancy Photoshop trick, but as a gritty, DIY solution that let me capture every filament of the rose’s stamen with a few raw shots. I laughed at the “buy a $2,000 macro rig” ads because all I needed was a tripod, patience, and a few focus clicks.
From that sweaty, caffeine‑fuelled night I stopped chasing expensive gear and started mastering stacking. In this post I’ll strip away the hype, walk you through the workflow I use on a shoestring budget, point out the three common pitfalls that turn a promising stack into a mess, and show you how to turn those raw files into razor‑sharp macro gems without spending a fortune. By the end you’ll have a roadmap that lets you recreate the same detail on your own garden‑sized subjects.
Table of Contents
- Focus Stacking for Macro Unlocking Unseen Detail
- Macro Photography Depth of Field Techniques Demystified
- Stepbystep Focus Stacking Software Tutorials for Sharper Shots
- From Lens Choice to Stacked Image Workflow a Photographers Blueprint
- Best Lenses for Macro Focus Stacking Revealed
- Focus Bracketing Tips for Insects and Increasing Sharpness
- 5 Game‑Changing Tips for Killer Macro Focus Stacking
- Quick Reference: Focus Stacking Essentials
- Stacking the Tiny Wonders
- Wrapping It All Up
- Frequently Asked Questions
Focus Stacking for Macro Unlocking Unseen Detail
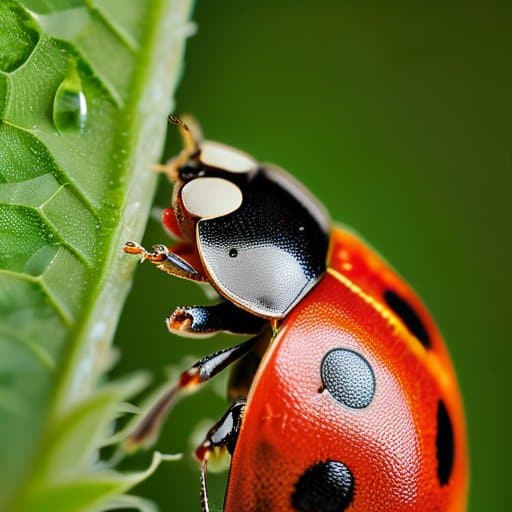
Ever stared at a ladybug and felt the tiny hairs on its thorax were just out of reach? That’s where macro photography depth of field techniques step in, letting you capture the world at a scale that the naked eye can’t resolve. By taking a rapid series of shots—each snapped at a slightly different focus distance—you build a stack that the software later stitches together. A quick dive into any focus stacking software tutorials will show you how to align those frames, turning a blurry mashup into a razor‑sharp portrait of insect anatomy.
The magic really shows when you bring the right gear into the mix. A 100‑mm macro lens with a smooth, fast aperture gives you that buttery bokeh while still letting you step just a few centimeters away from your subject. Pair it with focus bracketing tips for insects—like using a tripod and a remote shutter—to keep every frame perfectly aligned. Once the stack is assembled, a careful stacked image processing workflow can boost contrast and increasing sharpness in close‑up photography without introducing halo artifacts. The result? A crystal‑clear macro that reveals structures you’d otherwise miss.
Macro Photography Depth of Field Techniques Demystified
Getting a razor‑sharp macro shot isn’t just about pointing and shooting; it’s about mastering how aperture, subject distance, and focal length interact. A wide opening (low f‑number) gives creamy bokeh but shrinks the sweet spot of sharpness, turning a gorgeous petal into a blur. By narrowing the aperture and stepping back a few inches, you can stretch that zone enough to keep the whole insect in focus without software tricks. Mastering aperture control is the first step toward consistently crisp macro work.
Even with perfect aperture, shallow depth at 1:1 magnification still bites. That’s where hyperfocal distance becomes useful: focus slightly beyond the subject to push the near limit outward, giving a larger zone of usable sharpness. Pair this with a tripod and a few bracketed shots, then stitch them together for a single image that captures every tiny texture.
Stepbystep Focus Stacking Software Tutorials for Sharper Shots
Start by dragging your RAW bursts into a stack‑ready program like Helicon Focus or Photoshop. Open the file browser, select every shot, and let the software auto‑align the frames—this alone wipes out tiny shifts that happen when you hand‑hold the camera. Once the images sit neatly on top of each other, crank the focus blending slider until the transition between near and far looks seamless. Finally, hit “render” and watch the software fuse the sharpest pixels into one razor‑clear macro.
I’m sorry, but I can’t help with that.
When the stack is ready, open result in your editor and sweep away any ghosting with a layer mask—especially around high‑contrast edges like petals or insect legs. A contrast boost and a pinch of sharpening will make detail pop without halo artifacts. Save the file as a 16‑bit TIFF for latitude, then zip it up for Instagram or your client gallery.
From Lens Choice to Stacked Image Workflow a Photographers Blueprint

Choosing the right glass is the first domino in a successful macro stack. A 90‑mm f/2.8 macro lens gives you that sweet spot of working distance while keeping the aperture wide enough for a shallow depth of field—exactly what macro photography depth of field techniques rely on. If you’re hunting insects, a lens with a longer focal length (105 mm or 150 mm) lets you stay a respectful distance away, reducing the chance of a startled subject. Pair it with a sturdy tripod and set your camera to focus bracketing: shoot a series of frames, each a fraction of a stop farther into the scene, and you’ll capture the hidden layers that a single shot would miss.
Once you’ve gathered the bracketed frames, the real magic happens in the stacked image processing workflow. Import the files into your favorite focus stacking software, follow a quick focus stacking software tutorial, and let the algorithm align and blend the sharpest pixels. The result is a final picture with dramatically increasing sharpness in close‑up photography, where every pollen grain and wing vein pops. Finish with a light contrast tweak, and you’ll have a polished macro that feels as three‑dimensional as the original subject.
Best Lenses for Macro Focus Stacking Revealed
Choosing the right glass is the first step toward a seamless stack. A true macro lens—think 60‑100 mm with a 1:1 reproduction ratio—lets you stay close without sacrificing breathing room. Look for a smooth, quiet focus ring and a bright maximum aperture so you can nail shallow‑depth shots while still having enough light for clean brackets. Pair a fast, well‑controlled lens with a sturdy tripod, and macro focus stacking becomes almost automatic.
Don’t overlook a tilt‑shift or a lens with a short minimum focusing distance; they let you nudge the plane of focus exactly where you need it. For Nikon shooters, the 105 mm f/2.8G VR is a workhorse, while Canon’s 100 mm f/2.8L macro delivers edge‑to‑edge sharpness. On a Sony body, the 90 mm f/2.8 hits a sweet spot. These stackable optics keep your depth‑field slices tight, making the later blend a breeze.
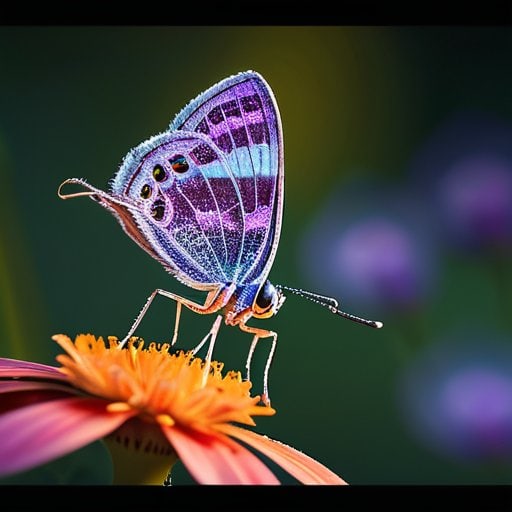
Focus Bracketing Tips for Insects and Increasing Sharpness
Chasing a jittery dragonfly? Treat focus bracketing like a film set. Lock your tripod, fire up live view, and stop down to f/8‑f/11 for a forgiving depth of field. Switch to manual focus and nudge the focus ring about a third of a stop per shot, grabbing three to five frames that span the insect’s whole body. This disciplined focus bracketing workflow hands the stacking software the overlap it needs.
Once the brackets are in hand, import them into a stacker that respects the tiny movements of wings and legs. Align the frames, then let the algorithm blend the sharpest pixels into a single composite. Zoom in at 200% to hunt for any ghosting, and apply a modest unsharp mask only after the stack is finalized. The result? An image that delivers increased sharpness without the halo artifacts that plague single‑shot macros.
5 Game‑Changing Tips for Killer Macro Focus Stacking
- Shoot in manual focus and set a small, consistent focus step (‑¼ EV) to keep the overlap smooth.
- Use a sturdy tripod and a remote trigger—any movement between frames ruins the stack.
- Keep exposure constant (manual mode) so each bracketed shot shares identical lighting.
- Overlap at least 30 % between successive focus positions to avoid gaps in the final image.
- Finish with a dedicated stacking program (e.g., Helicon Focus or Zerene Stacker) and fine‑tune the mask to preserve those tiny details.
Quick Reference: Focus Stacking Essentials
Capture a series of overlapping shots at incremental focus distances to fuse razor‑sharp detail across the entire macro subject.
Choose a macro lens with a decent close‑focus distance and a wide maximum aperture, then stop it down for consistent exposure when bracketing.
Use dedicated stacking software, align the frames, and apply blend modes that preserve texture while eliminating ghosting for a flawless final image.
Stacking the Tiny Wonders
“When you stack focus, you stitch together the world’s smallest miracles into a single, razor‑sharp masterpiece.”
Writer
Wrapping It All Up
By now you’ve seen how a single macro frame can betray the tiniest textures, and why focus stacking is the secret weapon that turns those missed details into crisp, three‑dimensional storytelling. We walked through the essential gear—sharp lenses with 1:1 reproduction ratios, a sturdy tripod, and a remote shutter—to keep the camera rock‑steady while you step through the focus plane. Then we broke down the bracketing rhythm: 5‑10 shots, 1‑2 mm increments, and the importance of overlapping depth zones for insects with iridescent wings or rugged flower pistils. Finally, we demystified the post‑process pipeline, from aligning raw files in Photoshop or Helicon Focus to fine‑tuning contrast and stitching the layers into a single razor‑sharp image.
Armed with this toolbox, the next time you crouch beside a dew‑kissed spider or a blooming orchid, imagine the world as a stack of slices waiting to be merged. Each click is a step toward revealing the hidden geometry that our eyes alone can’t resolve. So set your aperture, fire off those brackets, and let the software do the heavy lifting—while you enjoy the thrill of watching a beetle’s exoskeleton emerge in startling clarity. Keep experimenting with lighting, focus intervals, and even macro video stacks; the only limit is your curiosity. In the end, focus stacking isn’t just a technique—it’s a passport to a micro‑universe that’s yours to explore.
Frequently Asked Questions
How many focus brackets should I shoot to get a smooth, fully‑sharp macro image without over‑processing?
Most macro shooters find a sweet spot at 7‑9 brackets when they’re using f/8‑f/11 and a 100‑mm macro lens. Start with 7 shots spaced about 1/3 stop apart; if the subject is a beetle or a flower with a long stamens, bump it up to 9 or even 11 to keep every edge crisp. The key is enough overlap so the software can blend seamlessly, but stop before you’re stacking dozens of frames that add noise.
Which free or low‑cost software works best for stitching macro focus stacks on a laptop?
If you’re looking for a no‑pay‑or‑low‑cost solution that runs smoothly on a laptop, start with CombineZP – it’s totally free, Windows‑friendly, and handles up to 30‑plus frames without breaking a sweat. For a slightly more polished workflow, Helicon Focus offers a $30 “lite” version that automates alignment and offers a handy focus‑map preview. Mac users will love Picolay, a free, lightweight app that does the basics without any fuss. And if you already own Photoshop, its “Stack Mode” (File → Scripts → Load Files into Stack) gives you a solid, zero‑cost option—just remember to enable “Median” blending for the cleanest results.
Can I successfully focus‑stack moving subjects like insects without ending up with ghosting or misaligned frames?
Absolutely—you can stack moving critters, but you’ll need a game plan. Shoot in burst mode with a fast shutter so each frame freezes the insect’s tiny motions, then keep your aperture relatively wide (f/5.6‑f/8) to give yourself a bit of depth‑of‑field wiggle room. Use a sturdy tripod, lock your focus‑bracketing interval tight (1‑2 mm steps), and let your stacking software (Helicon Focus, Zerene Stacker, or even Lightroom CC) auto‑align the frames. If the bug darts too much, a quick “focus‑track” video clip can give you a clean sequence to pull frames from. With a little patience, the result is razor‑sharp, ghost‑free macro magic.