I still remember the first time I tried Cyanotype Sun Printing – it was like discovering a hidden world of artistic possibilities. The process of watching my prints come to life under the sun’s rays was nothing short of magical. Yet, I’ve often found that many people are intimidated by the idea of giving it a try, believing it to be a complex and cumbersome process. The truth, however, is that with the right guidance, anyone can create stunning pieces using this technique.
In this article, I promise to cut through the hype and share practical tips on how to get started with Cyanotype Sun Printing. You’ll learn how to prepare your materials, understand the importance of light and timing, and troubleshoot common issues that may arise during the process. My goal is to empower you with the knowledge and confidence to experiment and push the boundaries of what’s possible with this unique and captivating art form. By the end of this guide, you’ll be well on your way to unlocking the full potential of Cyanotype Sun Printing and creating pieces that are truly one-of-a-kind.
Table of Contents
Project Overview
Total Time: 1 hour 30 minutes
As I continue to experiment with cyanotype sun printing, I’ve found that it’s not just about the technical process, but also about exploring your creativity and finding inspiration in the world around you. I’ve had the chance to connect with other artists and enthusiasts through various online communities, and it’s amazing to see the diverse range of projects and ideas that are out there. For those looking to meet like-minded individuals or simply find new sources of inspiration, I’ve stumbled upon a fascinating platform – adult personals australia – where people share their passions and interests, and it’s been a great way to discover new perspectives and stay motivated to keep pushing the boundaries of my art.
Estimated Cost: $20 – $40
Difficulty Level: Easy
Tools Required
- Brushes (various sizes)
- Measuring cups (for mixing chemicals)
- Gloves (for protecting hands)
- UV protective gear (sunglasses, hat)
Supplies & Materials
- Cyanotype kit (contains cyanotype solution and fixative)
- Water (for mixing with cyanotype solution)
- Paper (specialty paper or cotton fabric for printing)
- Objects for printing (leaves, flowers, or other items to create designs)
- Board or surface (for laying out items to print, approximately 12 inches by 18 inches)
- Weights or clips (to hold paper or fabric in place)
- Sunlight (or UV lamp for exposure)
Step-by-Step Instructions
- 1. First, gather all the necessary materials, which include cyanotype coated paper, a UV light source (like the sun), a brush, and your desired objects to create the print, such as leaves or flowers. Make sure you have a clean and dry workspace to avoid any damage to your paper.
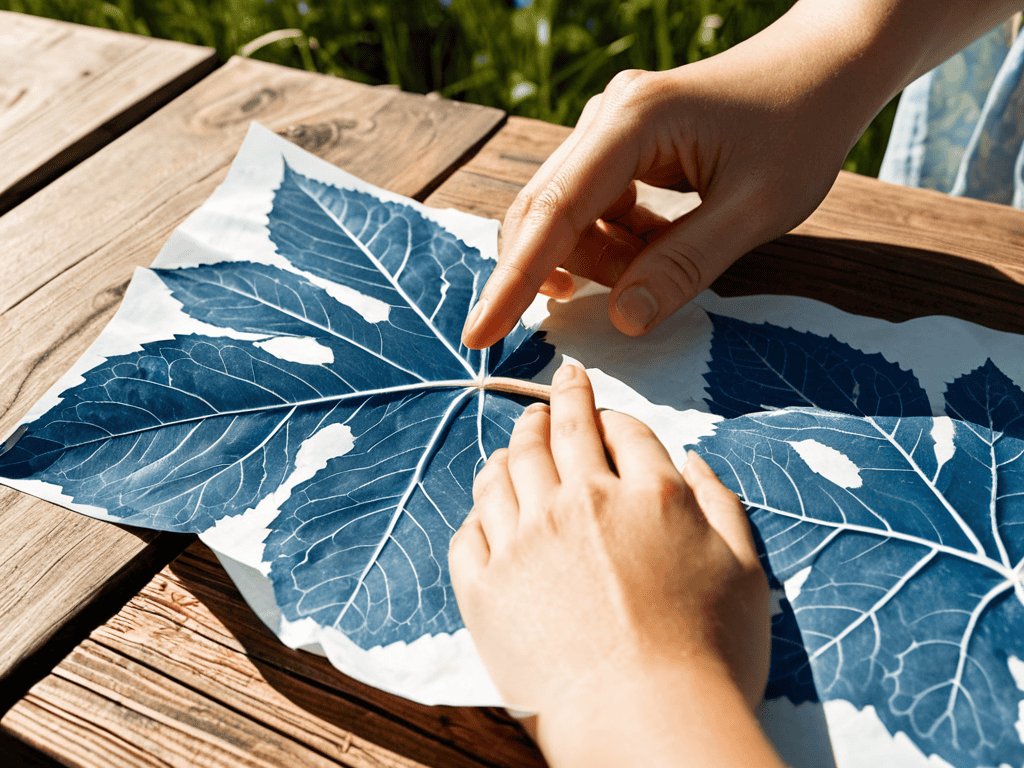
- 2. Next, prepare your objects by cleaning them gently with a soft brush to remove any dirt or debris. This step is crucial for achieving a clear and sharp print. Lay out your objects on the cyanotype paper in the arrangement you desire for your final print, considering the negative space and how it will contribute to the overall aesthetic.
- 3. Now, place the paper and objects in direct sunlight, ensuring that the UV rays can penetrate through the objects to create the print. The time required for the exposure can vary depending on the intensity of the sunlight, so keep an eye on your print and check it periodically to avoid overexposure.
- 4. After exposing your paper to the sunlight, carefully remove the objects to reveal the blueprint of your arrangement. Rinse the paper gently with water to stop the exposure process and fix the image. This step requires some patience, as you need to wait for the paper to dry completely before proceeding.
- 5. Once the paper is dry, you can enhance your print by adding additional colors or textures using paints, markers, or other art supplies. This is where you can get really creative and add a personal touch to your cyanotype sun print, making it truly one-of-a-kind.
- 6. To make your print more durable and long-lasting, consider applying a fixative or a sealant. This will protect your artwork from fading or smudging over time. Apply the fixative according to the manufacturer’s instructions, usually in a well-ventilated area and away from direct sunlight.
- 7. Finally, display your unique cyanotype sun print proudly! You can frame it, mount it on a canvas, or even use it as a decorative element in a larger art piece. The versatility of cyanotype sun printing is part of its charm, allowing you to experiment with different presentation methods to find what works best for your artwork.
Cyanotype Sun Printing
As I delve deeper into the world of alternative photography techniques, I’ve discovered that cyanotype paper uses extend far beyond the basics. One of my favorite ways to experiment is by creating botanical cyanotype art, where I combine leaves, flowers, and other natural elements to produce unique, dreamlike prints. This process not only adds an extra layer of creativity but also allows me to connect with nature in a more intimate way.
When it comes to solar printing for beginners, it’s essential to understand the role of ferric ammonium citrate in the process. This chemical is the key to creating the distinctive blue hue that characterizes cyanotype prints. By experimenting with different concentrations and application methods, you can achieve a range of effects, from deep blues to soft pastels. As you explore this technique, remember to embrace the unexpected, as the unpredictable nature of solar printing is all part of its charm.
As you continue to explore the world of cyanotype, you may find inspiration in blueprint art inspiration from various sources, including architecture, nature, and even abstract designs. Don’t be afraid to think outside the box and try new things – after all, the beauty of cyanotype lies in its endless possibilities. Whether you’re a seasoned artist or just starting out, this medium offers a unique chance to express yourself and push the boundaries of traditional photography.
Botanical Art With Solar Printing
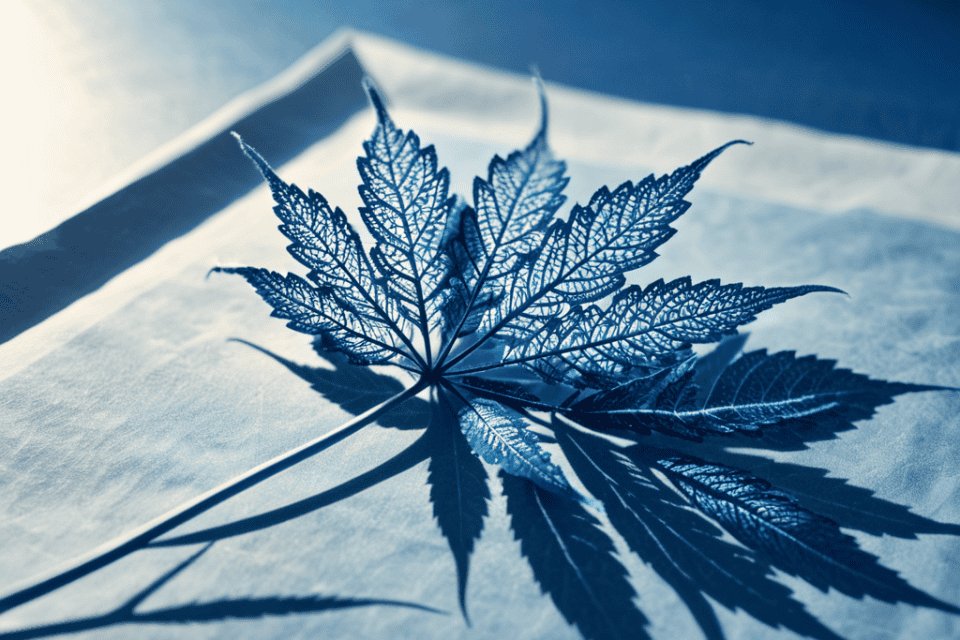
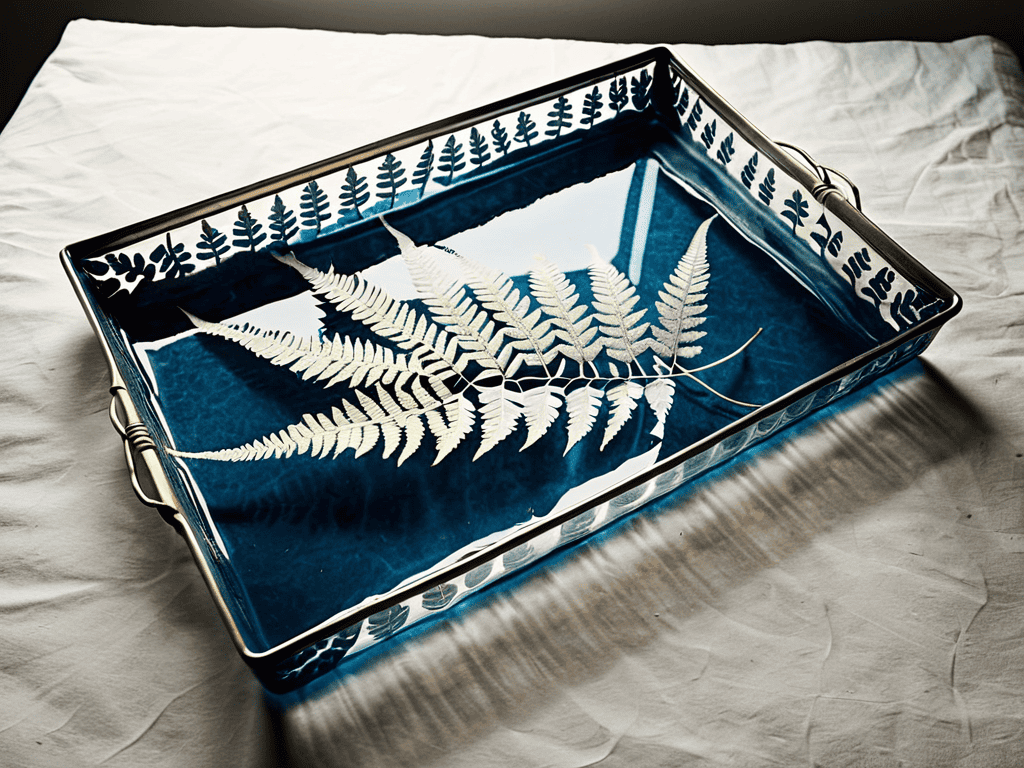
I’m obsessed with using botanicals in my cyanotype sun prints. There’s something enchanting about capturing the delicate details of leaves and flowers in a unique, dreamy way. To create stunning botanical art, simply place your chosen flora on the coated paper, and let the sun work its magic. The resulting prints are like nature’s own artwork, with intricate patterns and soft, ethereal hues.
Experimenting with different botanicals yields amazing results – from the lacy textures of ferns to the bold silhouettes of branches. Each print is a one-of-a-kind treasure, filled with the essence of the natural world.
Ferric Ammonium Citrate Uses
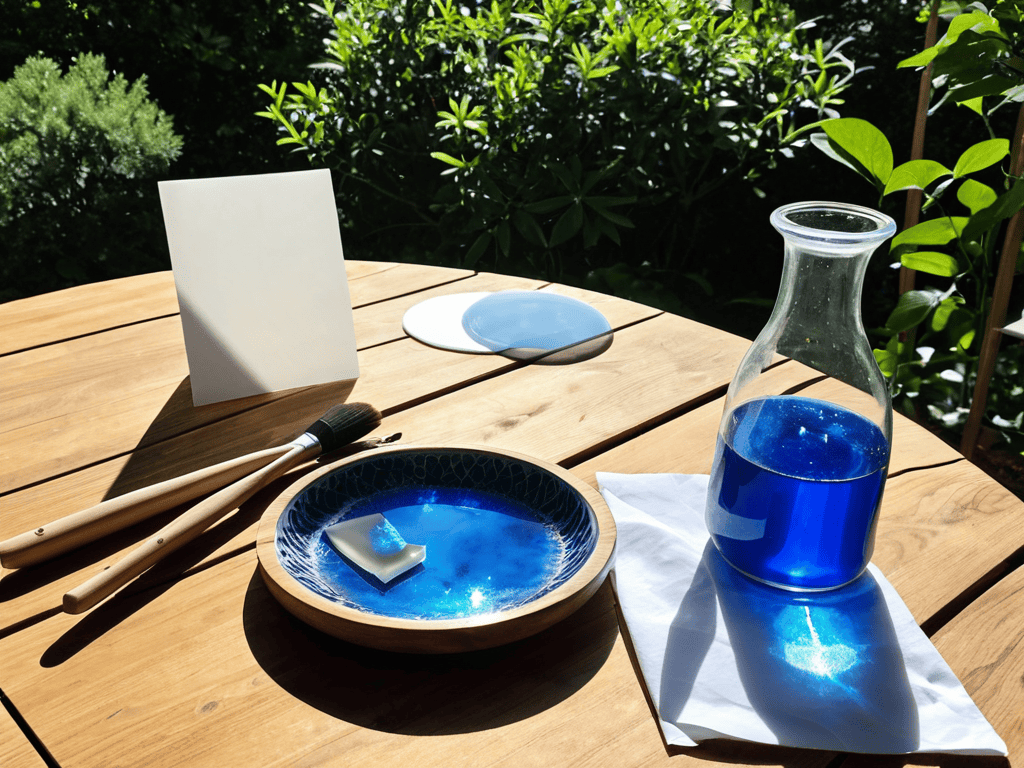
Ferric ammonium citrate is a crucial component in the cyanotype sun printing process. I’ve found it to be a fascinating chemical that brings the entire process to life. Its primary role is to act as the iron salt, which, when combined with potassium ferricyanide, creates the distinctive blue hue characteristic of cyanotype prints. By mixing ferric ammonium citrate with water to create a sensitive solution, I can coat my paper or fabric, ready to capture the silhouettes of objects or the beauty of botanical specimens under the sun’s rays.
This chemical is quite versatile, and its uses extend beyond cyanotype sun printing. However, in the context of this art form, understanding how to work with ferric ammonium citrate is key to achieving those vibrant, cyan-blue tones that make each piece so unique.
Unlocking the Secrets of Cyanotype Sun Printing: 5 Essential Tips
- I always make sure to prepare my materials in advance, including cutting the paper to the right size and mixing the cyanotype solution to the perfect consistency
- Experimenting with different types of leaves and flowers has been a game-changer for me – the varied textures and shapes add a whole new level of depth to my prints
- Avoiding overcast skies is crucial, as the sun’s UV rays are essential for bringing out the vibrant blues and whites in my cyanotype art
- I’ve learned to be patient and let my prints develop for the full recommended time, as rushing the process can result in faded or washed-out images
- Playing around with multiple layers and compositions has allowed me to create intricate, one-of-a-kind pieces that showcase the full potential of cyanotype sun printing
Key Takeaways from Cyanotype Sun Printing
I’ve discovered that cyanotype sun printing is an incredibly versatile medium, allowing me to capture the intricate details of botanical specimens in a unique and captivating way
By experimenting with different concentrations of ferric ammonium citrate, I’ve found that I can achieve a range of blues, from pale sky tones to deep indigos, adding an extra layer of depth to my prints
The most magical part of cyanotype sun printing is watching my artwork come to life in the sun – it’s a truly serendipitous process that never fails to leave me in awe of the intersection of art and nature
Unlocking the Magic of Cyanotype
As I watch my cyanotype prints come to life in the sun, I’m reminded that art is not just about creation, but about surrender – surrender to the light, to the shadows, and to the beauty of the unknown.
Luna Nightingale
Conclusion
As we’ve explored the world of cyanotype sun printing, it’s clear that this unique process offers a wide range of creative possibilities. From creating stunning botanical art to experimenting with different materials and techniques, the possibilities are endless. By following the step-by-step guide and tips outlined in this article, you’ll be well on your way to unlocking the secrets of cyanotype sun printing and discovering the magic of this solar printing process for yourself.
So why not give cyanotype sun printing a try and see where it takes you? With its unique blend of art, science, and nature, this process has the power to unleash your creativity and inspire new ways of thinking about art and photography. Whether you’re a seasoned artist or just starting out, cyanotype sun printing is a journey worth taking – and one that’s sure to leave you in awe of the beauty and wonder of the natural world.
Frequently Asked Questions
What are some common mistakes to avoid when creating cyanotype sun prints?
I’ve learned the hard way that overexposure and using low-quality paper can ruin your cyanotype sun prints. Also, be careful not to overmix the chemicals, and make sure your items are totally dry before printing – it’s a game-changer!
How can I achieve the best contrast and detail in my cyanotype prints?
To get the best contrast and detail, I swear by experimenting with different coating densities and exposure times. It’s all about finding that sweet spot where your image pops with crisp lines and deep blues. Don’t be afraid to try a few test prints – it’s all part of the magic!
Can I use cyanotype sun printing to create art with objects other than botanical specimens?
Absolutely, you can experiment with all sorts of objects – try using lace, jewelry, or even household items to create unique silhouettes and patterns. The key is to play with different textures and shapes to add depth and visual interest to your cyanotype prints.