
I still remember the day I finally decided to tackle the digital photo chaos that had been haunting me for years. I was on a mission to learn how to organize your digital photos once and for all, and I was determined to find a system that actually worked. As a former high school tech teacher, I’ve seen my fair share of disorganized digital libraries, and I knew that I wasn’t alone in this struggle. The truth is, most of us have been led to believe that organizing our digital photos is a daunting task that requires a lot of time and technical expertise. But I’m here to tell you that it’s not as complicated as it seems, and with the right approach, you can tame the digital photo chaos and keep your images organized for good.
In this article, I’ll share my personal story of how I learned how to organize your digital photos once and for all, and provide you with a step-by-step guide to help you achieve the same. You’ll learn how to create a simple and effective system for organizing your digital photos, and how to maintain it over time. I’ll cut through the noise and give you practical advice that you can apply immediately, without any fancy software or technical jargon. By the end of this article, you’ll have the confidence and skills to take control of your digital photo library and keep it organized for years to come.
Table of Contents
Guide Overview: What You'll Need
Total Time: 2 hours 30 minutes
Estimated Cost: $0 – $100
Difficulty Level: Intermediate
Tools Required
- Computer (with internet connection)
- External Hard Drive (for backup purposes)
- Photo Management Software (e.g., Adobe Lightroom, Google Photos)
Supplies & Materials
- Cloud Storage Subscription (optional)
- Portable Storage Device (e.g., USB flash drive, for transferring files)
Step-by-Step Instructions
- 1. First, let’s start by gathering all your devices that contain digital photos, including your phone, camera, and computer. This will give you a clear picture of what you’re working with and help you understand the scope of your project. Take a few minutes to collect all these devices and get ready to begin the organization process.
- 2. Next, you’ll need to transfer all your photos to your computer. This can be done using a USB cable for your phone and camera, or by uploading them from your devices to your computer. If you have a lot of photos, this step might take some time, but it’s essential to have all your photos in one place before you start organizing them.
- 3. Now that all your photos are on your computer, it’s time to create a folder structure. This will be the foundation of your organization system, so take your time to think about how you want to categorize your photos. You can create folders by year, event, or category (e.g., vacations, birthdays, etc.). Make sure your folder names are clear and consistent, so you can easily find what you’re looking for later.
- 4. With your folder structure in place, you can start sorting your photos into their respective folders. This can be a time-consuming process, but it’s worth it in the long run. As you sort your photos, you can also delete any duplicates or low-quality images that you don’t want to keep. This will help declutter your collection and make it easier to find the photos you want.
- 5. Once you’ve sorted all your photos, it’s a good idea to add tags and descriptions to help you find specific images later. You can use keywords like the location, event, or people in the photo to make it searchable. This step might seem tedious, but it’s a great way to make your photo collection more accessible and enjoyable to browse through.
- 6. Now that your photos are organized, it’s essential to back up your collection to prevent losing any of your precious memories. You can use an external hard drive or a cloud storage service like Google Drive or Dropbox to store your photos. Make sure to set up a regular backup schedule, so your photos are always safe and up-to-date.
- 7. Finally, take some time to review and maintain your photo organization system. Set aside some time each month to go through your new photos, sort them into their respective folders, and add any relevant tags or descriptions. This will help keep your collection organized and make it easier to find the photos you want in the future. By following these steps and staying consistent, you’ll be able to enjoy your photos without the hassle of searching through a disorganized collection.
Organizing Digital Photos Once
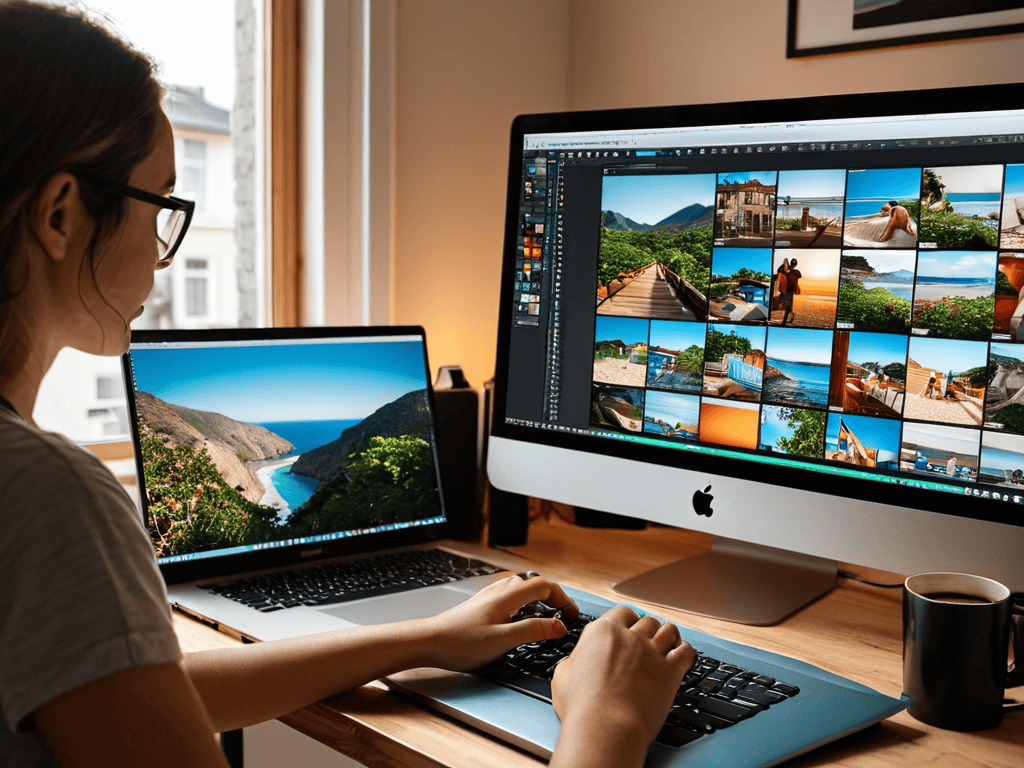
As we dive into the process of organizing our digital photos, it’s essential to consider the concept of batch editing photos. This technique allows us to apply changes to multiple images at once, saving us a significant amount of time and effort. By selecting a group of photos and applying a uniform set of edits, we can maintain a consistent look and feel across our entire collection. This approach is particularly useful when working with large batches of photos from a single event or period.
When creating a photo archive, it’s crucial to think about digital photo backup strategies. We should always ensure that our photos are safely stored in multiple locations, such as external hard drives or cloud storage services. This way, we can rest assured that our precious memories are protected against data loss or corruption. By implementing a robust backup system, we can focus on the task at hand, which is to organize and enjoy our photos.
To take our photo organization to the next level, we can utilize metadata for photo organization. By adding relevant information, such as captions, keywords, and dates, we can make our photos more discoverable and easily searchable. This approach enables us to quickly locate specific photos and even create custom albums or collections based on particular themes or events. By leveraging metadata, we can unlock the full potential of our photo collection and make the most of our digital photo archive.
Lesson 1 Batch Editing Photos
Now that we’ve gotten our digital photos organized, let’s talk about editing them in batches. This is a game-changer for saving time and ensuring consistency across your photos. I like to think of batch editing as the woodworking equivalent of sanding multiple pieces of wood at once – it’s all about efficiency.
When editing in batches, you can apply the same adjustments to multiple photos at once, which is especially useful if you’ve taken a series of photos in the same lighting conditions. This way, you can make uniform changes to exposure, contrast, and color balance, giving your photos a cohesive look.
Using Metadata for Photo Organization
As you continue to work on organizing your digital photos, you may find that you need a bit of a break or a chance to connect with others who are going through a similar process. I’ve found that joining online communities, such as the travestichat forum, can be a great way to stay motivated and learn from others who are passionate about photography and digital organization. By connecting with others, you can gain new insights and tips for streamlining your workflow, which can be incredibly helpful as you work to bring order to your digital photo collection.
Now that we’ve covered batch editing, let’s talk about using metadata for photo organization. This is a powerful way to add context to your photos, making them easier to search and categorize. By including information like captions, keywords, and location data, you can create a rich metadata profile for each image.
I like to think of metadata as the “invisible labels” on my digital photos. Just as I label each drawer in my woodworking shop, metadata helps me quickly identify and find specific photos, even in a large collection. In the next part of this lesson, we’ll explore how to add and edit metadata for your digital photos, and I’ll share some tips for making the most of this powerful organizational tool.
5 Essential Tips for Taming Your Digital Photo Collection
- Start by designating a single folder on your computer as the central hub for all your digital photos, making it easier to locate and manage them
- Use a consistent naming convention for your photo files, including the date, event, or location, to simplify searching and identification
- Implement a tagging system that categorizes your photos by theme, person, or place, allowing for quick filtering and retrieval
- Utilize the metadata features of your photo editing software to add descriptive information, such as captions, keywords, and camera settings, to each image
- Schedule regular backups of your organized photo collection to an external drive or cloud storage service, ensuring your memories are safe and accessible for years to come
Key Takeaways for Organizing Your Digital Photos
By following a step-by-step approach, you can bring order to your digital photo collection and make your images easily searchable and accessible
Utilizing batch editing and metadata can significantly streamline your photo organization process, saving you time and effort in the long run
Implementing a systematic method for organizing your digital photos will not only improve your ability to find specific images but also enhance your overall digital workflow and productivity
Bringing Order to Your Digital Life
The key to organizing your digital photos once and for all isn’t about mastering fancy software, but about creating a simple, repeatable system that brings clarity and calm to your digital world.
David Grant
Bringing Order to Your Digital World
In this guide, we’ve walked through a step-by-step process to organize your digital photos once and for all. We started with the basics of batch editing and moved on to the powerful tool of metadata for photo organization. By applying these methods, you’ll not only save time but also ensure that your photos are easily accessible and beautifully presented. Remember, the key to maintaining your digital photo library is to establish a routine and stick to it. Whether you’re a professional photographer or just someone who loves capturing life’s moments, having a well-organized digital photo collection can be incredibly liberating.
As you conclude this journey of organizing your digital photos, I want to leave you with a final thought: the power is in your hands. With the skills you’ve acquired, you can now create a digital photo sanctuary that reflects your unique perspective and style. Don’t be afraid to experiment, try new things, and make adjustments as you see fit. Your digital photo library is a reflection of your story, and by keeping it organized and beautiful, you’ll be able to cherish those memories for years to come. So, go ahead, take a step back, and admire your handiwork – you’ve earned it!
Frequently Asked Questions
How do I handle duplicate photos and decide which ones to keep?
Let’s tackle those duplicates. To decide which photos to keep, I recommend comparing them side by side and choosing the one with the best quality, composition, or sentimental value. You can also use photo management tools to automatically detect duplicates and help you decide which ones to keep or delete.
What are the best practices for naming and tagging my digital photos for easy searching?
When it comes to naming and tagging your digital photos, I recommend using a consistent format, including date, event, and location. For tags, focus on descriptive keywords like people, places, and activities. This will make searching a breeze. I’ll dive deeper into this in our next lesson, but for now, think of it like labeling your woodworking projects – clear and concise.
Can I use automated tools to organize my digital photos, or is manual sorting necessary?
While automated tools can help, I recommend a mix of both. Manual sorting ensures personal touch and accuracy, but tools can streamline tasks like tagging and categorizing. Let’s explore the best of both worlds in the next section, “Balancing Automation and Manual Sorting.